One of the most powerful features of Wirecast is the ability to composite very complex shots using different layers. For example – you might want a lower thirds graphic to appear on screen for just 30 seconds every time one of your cameras goes live. Or, you might have some computer audio you want your audience to hear, only when you make a particular screen capture shot live. The beauty of Wirecast is its flexibility. There are a lot of ways to set up your documents to create complex composite shots. This article will talk about some ways to think about setting up your Wirecast documents using layers so you can accomplish your live streaming goals.
Shot layers vs Main Shot Display layers
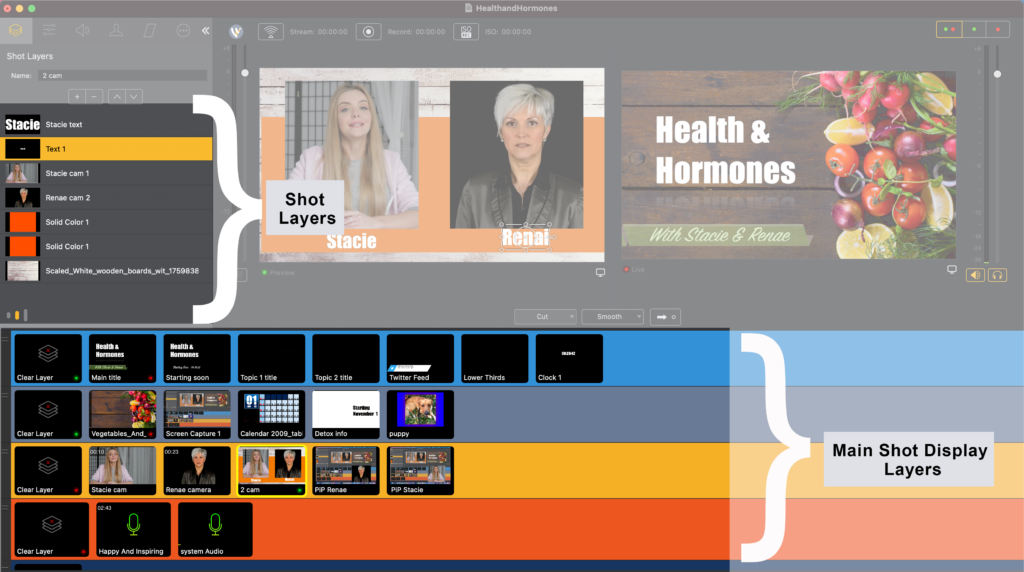
There are five (5) “Main Shot Display” layers that are located beneath the Preview and Live windows in the Wirecast UI.
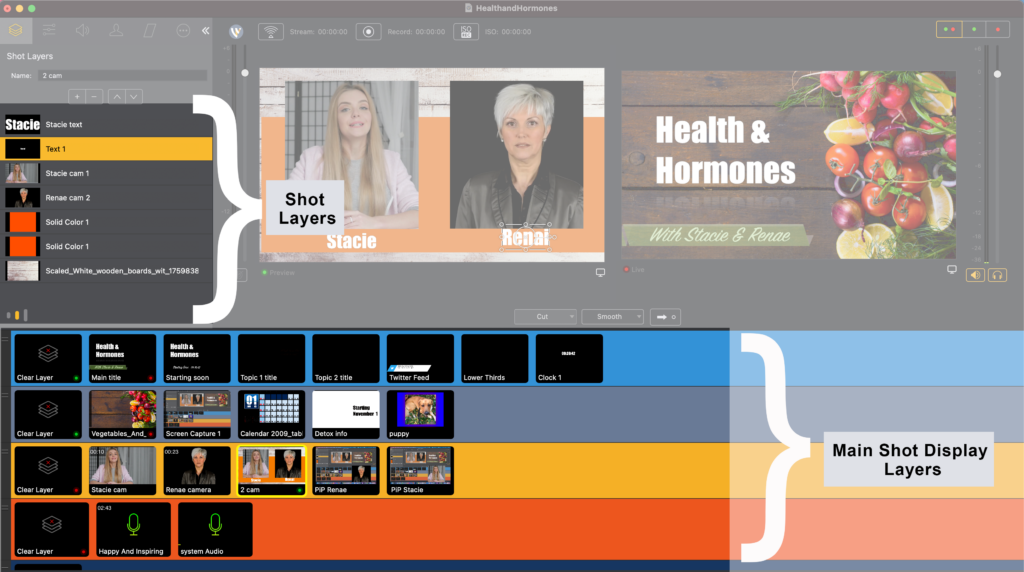
And for each “Shot” on the Main Shot Display Layer, you can add additional “Shot Layers” in the Shot Layers panel to the left of the Preview window.
There are good reasons to use one or the other to composite your shots, and generally, it’s going to come down to your preference. At a high level, using the Main Shot Display Layers lets you composite shots on the fly, whereas using Shot Layers lets you create contained composites all in one shot.
Example use the Main Shot Display layers for a Title
One typical set up using Main Shot Display layers would be to add logos on Main Layer 1, lower third titles on Main Layer 2, camera sources on Main Layer 3 and audio or microphones on Main Layer 4.
This would allow you to, for example, switch to a camera shot on Main Layer 3, then while that’s still live, turn on a lower third shot from Main Layer 2 (which will then be overlaid onto your camera shot from Main Layer 3). When you want to remove the lower third graphic, simply Clear Layer on Main Shot Display layer 2 and that graphic will disappear, but the camera shot will remain live.
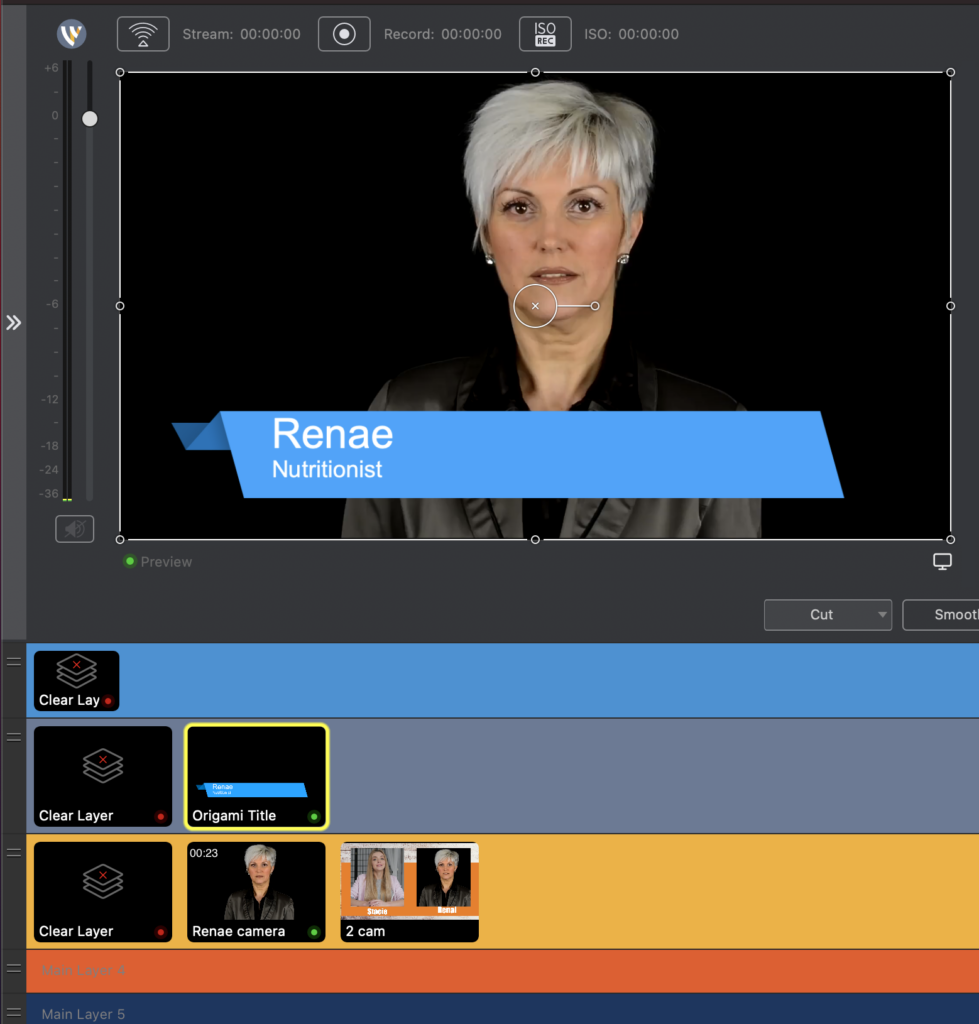
So this allows you to overlay elements that can be added and removed independently.
Example of using the Shot Layers for a Title
An alternative way to add a lower third title onto a camera is to add the title directly to the shot using Shot Layers. To do this, select your camera shot and open the Shot Layers panel to the left of the Preview window. You can click the (+) to add a new layer to this shot in the Shot Layers panel. In the screenshot below, I have added the Royal Title as a layer to this shot (which actually contains several layers – a graphic and 2 text layers). These Shot Layers will appear on this Shot EVERY time I switch to this shot on the Main Shot Display.
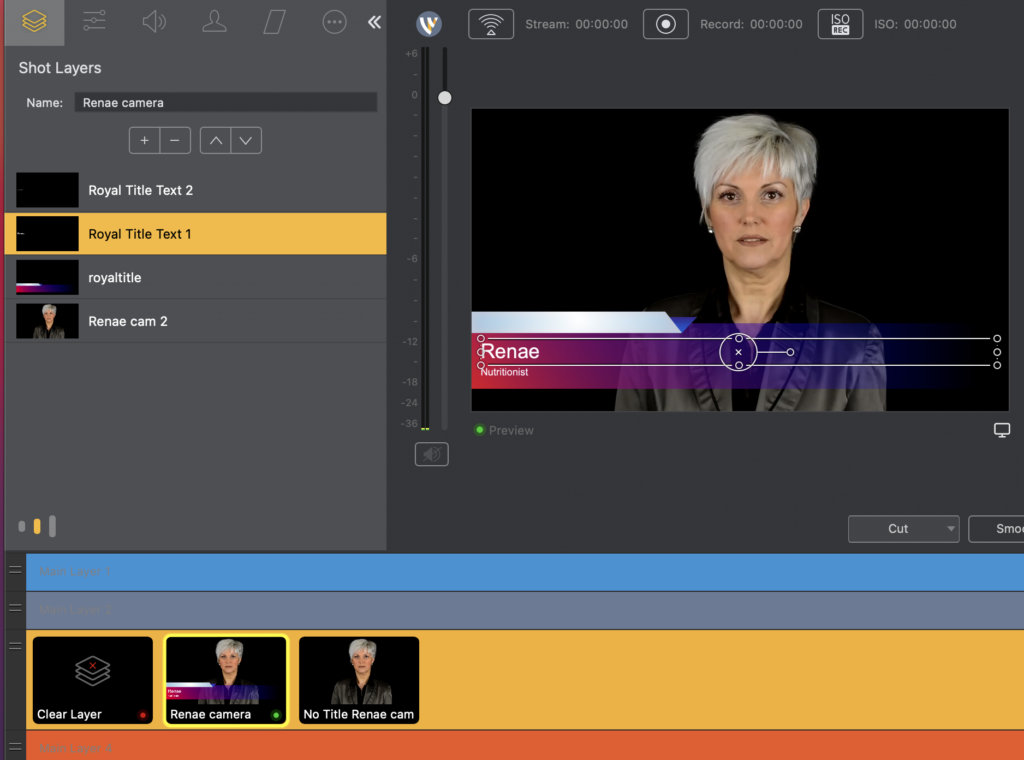
Some people might create one shot that has Shot Layers of a camera and a Title. Then they will create another shot with JUST the camera (no title). (See above screenshot) So when they want to turn the title on or off – – they switch between their 2 camera shots on Main Layer 3– turning the title on, or the title off.
Picture-in-Picture Shots
Picture-in-Picture or PIP is a great way to compose a shot that is informational or tutorial in nature. A PIP shot allows a speaker to show a slide or another camera angle, while also keeping their camera on screen.
There are a few ways good to create PIP shots in Wirecast. One way to set up a PIP would be to create one shot on a Main Shot Display layer that contains one Layer showing the live camera AND another Layer showing the slide/screenshot/other camera angle. (See Screenshot below)
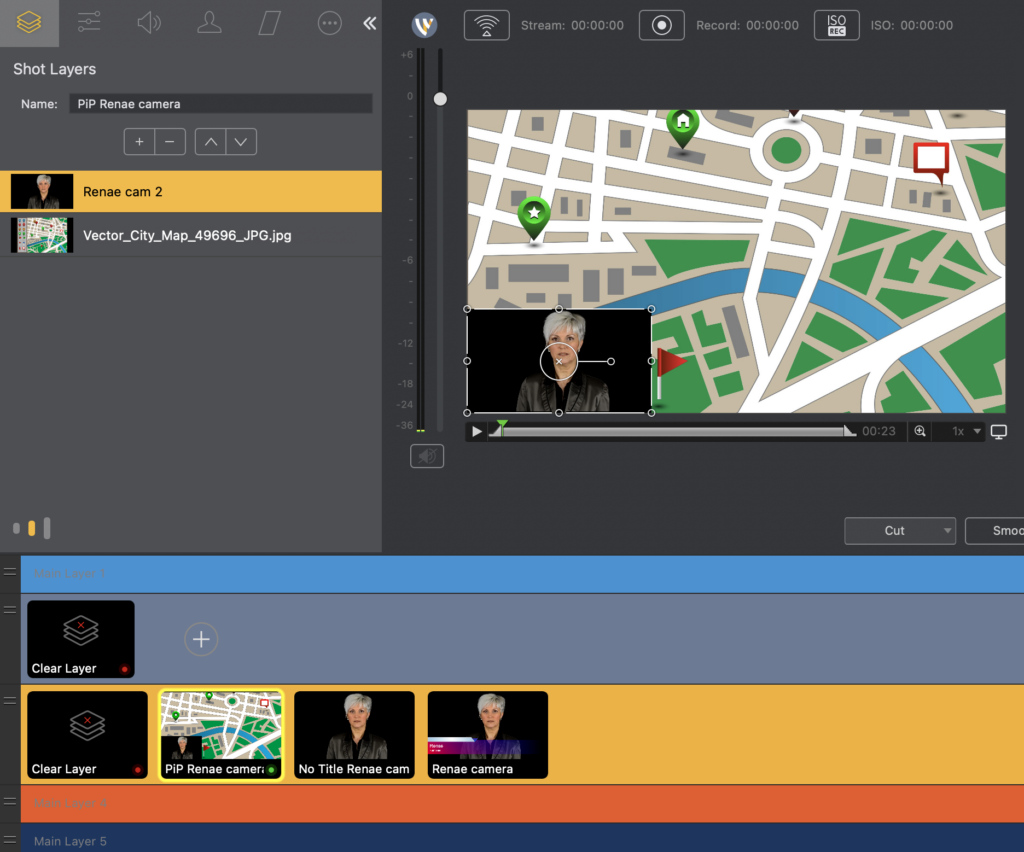
In this case the Renae Camera layer is scaled down and positioned in the lower left. This layer is above the layer of the map in the Shot Layers panel, so it appears on top of the map.
Another way to accomplish this same look is to use two shots on two different Main Shot Display layers as seen below. In this case, I have Renae’s camera on Main Shot Layer 2. It’s still scaled down and positioned in the lower left of the screen, but it’s the only source in that shot.
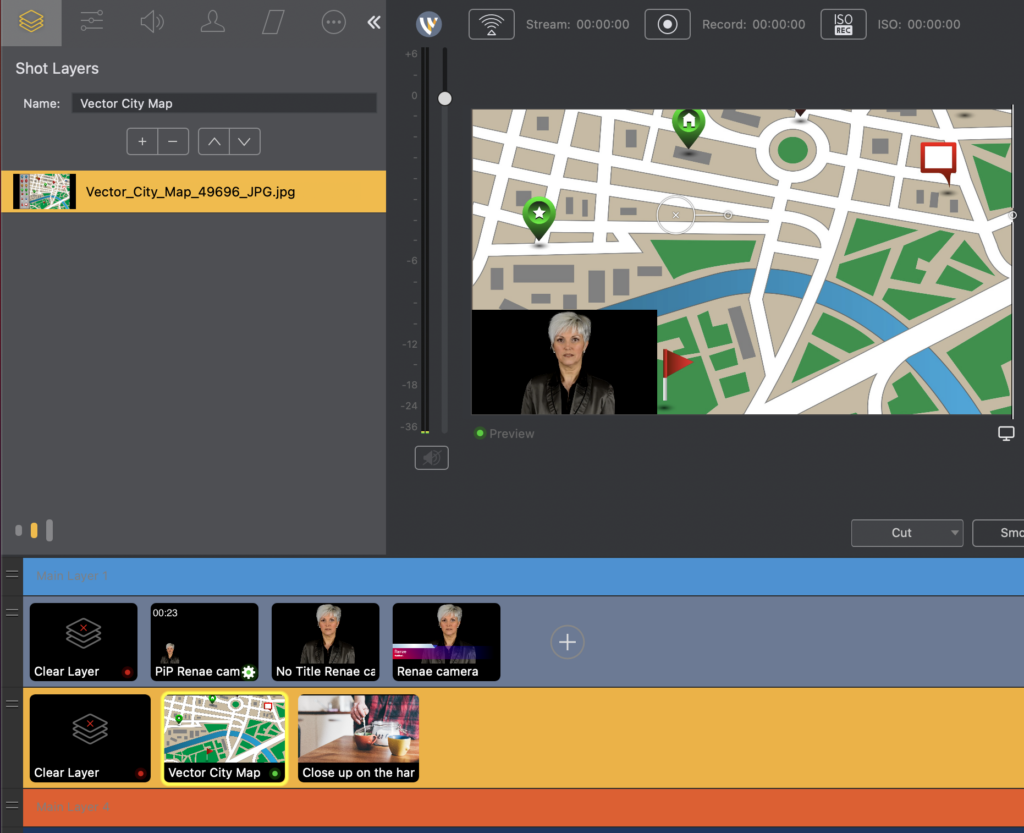
Then, on Main Shot Display layer 3, I have my city map, which is full screen. In this case, I can turn Renae’s PIP camera on and off by clearing Main Shot Display layer 2. I can also switch to another background image (Such as the Close Up angle next to the Map on Main Shot Display layer 3), and keep Renea’s live camera on screen.
Wirecast Flexibility
As you can see, the layering system in Wirecast allows for a lot of flexibility. Depending on what you’re trying to accomplish, and how YOU like to work – you have lots of options for setting up your broadcast.
How have YOU used layers in your broadcasts? We always love to see examples of how users have set up their documents. Share below in the comments!

