Windows, Controls, and Menus
You create broadcasts through the various windows, controls, and menus of Wirecast.
Topics
When you create a new document, Wirecast displays the document in the default layout. The main elements of the Wirecast layout are labeled in the following screen shot, and are described below.
Control/Status Bar
Control buttons and status information are displayed at the top of the default layout.
Wirecast displays the following controls and statistics:
When clicked, Wirecast begins streaming.
Total cumulative time the document has been streamed. This value does not reset when you start/stop the broadcast. If you save portions of the broadcast to disk, Wirecast still displays the total cumulative time.
This displays how long you have been recording. This value does not reset when you start/stop the broadcast. It is cumulative.
Click to open Replay+ISO settings dialog.
Displays the ISO recording time.
Opens the configuration window if you haven’t already configured your displays. Once you've configured your displays, this button places the windows on your displays as configured.
These three buttons enable you to choose to display the Preview Area, the Live Broadcast Area, or both in a divided display.
Note: To avoid decrease in video quality, Wirecast should not be used at CPU usage above 80%. See the Telestream Website for suggested configurations. You can also view streaming statistics by selecting Output > Show Statistics.
Transition Buttons
Wirecast displays up to four transition buttons: up to three Transition Controls buttons, and the Go button. You can assign transitions to the Transition Controls buttons. Typically, use Cut as the standard first transition control, and Smooth as the standard second transition control. Clicking the Go button executes the selected transition control.
Note: Preferences > General enables you to determine the number of Transition Controls buttons Wirecast displays (between 0 and 3).
Click the Cut button to make it the current transition type.
You can also select one of the two buttons by pressing Ctrl+1 or 2 keys for the two transition types displayed.
If you click the down-arrow on the right side of any of the transition buttons, you can select a new transition to assign to that button.
When clicked, Wirecast executes the transition selected, broadcasts the shot selected, and displays it in the Live Broadcast Area.
If AutoLive is enabled, the Go button appears with a red dot. When AutoLive is enabled, simply selecting a shot--without clicking the Go button, broadcasts the shot.
With AutoLive enabled, clicking the Go button updates the live shot with any changes you have made to it with the Shot Editor. If you have made no changes to the live shot, clicking the Go button does nothing when Wirecast is in AutoLive mode.
With AutoLive disabled, you can make several changes to your broadcast without your viewers seeing the change. This is most useful when an engineer runs your broadcast.
See Single-Click Switching with AutoLive and AutoLive.
See Selecting and Customizing Encoder Presets and Specifying the Transitions for the Transition Buttons.
Mode Selection Buttons
Button containing green and red dots
When clicked, Wirecast displays both the Preview Area and the Live Broadcast Area.
Button containing green dot
When clicked, Wirecast displays the Preview Area.
Button containing red dot
When clicked, Wirecast displays the Live Broadcast Area.
Note: These three buttons work the same as three of the options in the Layout Menu. See Layout Menu.
Playlist Controls
Wirecast provides basic playback controls for playlists. The controls are located at the bottom of the Playlist tab window and in the Source Properties tab for a selected playlist. You can transition to the previous or next shot in the list, set playlist behavior, shuffle the playlist order, and more.
Figure 1. Playlist Controls
Displays the total number of shots in the playlist.
Displays the duration of the playlist.
When checked, if you exit the playlist, when you return the playlist will resume playing at the location (same shot) as when you exited.
Click to shuffle the order of the playlist shots.
Transitions to the previous shot in the playlist if the playlist is currently live.
Transitions to the next shot in the playlist if the playlist is currently live.
Sets the behavior of the playlist when the last shot in the list has been played. A check mark indicates what menu item (behavior) is selected.
•Loop transitions back to the first shot, endlessly.
•Hold stays on the last shot. If the last shot is a clip, the last frame in the clip is displayed. If the last shot is a live shot, the live source stays active. If the last shot in a Playlist is a video clip Shot, it will obey the rules set for the video clip in the Media Properties Inspector tab under Source Properties. However, it will hold the Playlist on that last Shot if Set Playlist Behavior is set to “Hold”. Therefore, if you want to see the last video in the Playlist pause on the last frame, you must set When Finished to “Hold” under Source Properties, in addition to setting the playlist behavior to “Hold”. If you set When Finished to “Loop”, under Source Properties, the last video in the Playlist will continue to loop.
•Available Shots transitions to another shot on the same layer. All available shots are listed as menu selections. (In the example shown, the only available shot is “Logo”.)
•Previous Live Shot transitions back to the shot that was live before the playlist began playing.
•Current Preview transitions the contents of Preview to the Live Broadcast Area.
Sets the transition to use when switching between shots.
Replay Controls
When you select Replay + ISO > Start All, Wirecast displays the Replay controls, as shown here:
See Creating a Replay Shot from a Layer.
Playlist Countdown Timer Display
Wirecast displays a countdown timer below the Preview Area or Live Broadcast Area whenever you play a video shot or playlist. If you play multiple video shots, click the gear menu button and select the shot to associate with the countdown timer.
See Selecting and Customizing Encoder Presets.
Preview Area
Displays the selected shot as it would appear when broadcast, without broadcasting the shot. When the shot in the Preview Area is selected, Wirecast outlines the preview with a control frame for resizing and rotating the shot.
See Viewing the Preview Area, Viewing a Shot in the Preview Area, and Resizing or Rotating a Shot.
Live Broadcast Area
The Live Broadcast Area shows the un-encoded shot currently being encoded and broadcast. Also, you can play, pause, or scrub clips displayed in the Live Broadcast Area while they are broadcast.
See Switching with Preview and Single-Click Switching with AutoLive.
Snapshot Button
When clicked, Wirecast takes a snapshot of the Live Broadcast Area at canvas resolution, and saves the snapshot as a PNG file in the designated snapshot folder.
Final Mix Audio Panel
The Final Mix Audio panel enables you to control the output volume level, mute audio output, and mute the line-out feed for Preview and Live windows. The Preview and Live Volume controls enable you to adjust the audio volume for Preview and Live separately.
The Preview Monitor Audio Button
When clicked, Wirecast mutes or un-mutes Preview playback on your computer speakers or headphones.
The Monitor Preview Audio button and the Monitor Final Mix Audio buttons control whether you hear the output audio through your headphones or computer speakers. These do not affect what your viewers can hear. You can monitor Preview or Final, but not both at the same time. You can mute both.
If you do not want to broadcast audio, modify the encoder presets to not process audio through the encoder.
See Encoder Presets.
The Final Mix Monitor Audio button
When clicked, Wirecast mutes or un-mutes final mix playback on your computer speakers or headphones.
The Monitor Preview Audio button and the Monitor Final Mix Audio buttons control whether you hear the output audio through your headphones or computer speakers. These do not affect what your viewers can hear. You can monitor Preview or Final, but not both at the same time. You can mute both.
If you do not want to broadcast audio, modify the encoder presets to not process audio through the encoder.
See Encoder Presets.
Note: All Wirecast audio meters use a consistent dBFS scale. Whether you're viewing Multiviewer audio bars or the Advanced Audio Meter, the readings use the same scale. Level indicators turn yellow when they hit -6dB and red when they move above -1dB. All indicators show when audio is clipping by turning yellow or red.
See Controlling or Muting the Final Mix Audio Level and Displaying or Hiding the Final Mix Audio Panel.
The Final Mix Mute Button
When clicked, Wirecast mutes or un-mutes the final mix output.
The Final Mix Mute button controls what your viewers hear. You can quickly mute all your audio output with this button. This is great for quickly muting audio on your regular broadcast. When you mute the final mix audio, the encoder still generates audio, but the output gets muted for all program audio (except ISO-recorded sources). If, alternatively, you do not want to broadcast audio at all, it's better to modify the encoder presets to not process audio through the encoder, which will save system resources.
See Encoder Presets.
Layers
The horizontal bars towards the bottom of the screen are the layers. You can make more layers visible. Also, you can add, modify, and play shots from the layers.
By default, Wirecast displays five layers. Each layer can contain multiple shots. A red LED indicates that a shot is Live.
Wirecast allows you to put shots on any of the layers. Layering shots enables Wirecast to superimpose them, from the lowest layer to the highest, to form a single composite visual image during broadcast.
By default, Wirecast displays five layers. Each layer contains shots that can be selected by clicking a shot. A red LED indicates that a shot is selected. When a shot is selected it is displayed in the Live Broadcast Area. If you select multiple shots (by selecting a shot on more than one layer) Wirecast displays all of them in the Live Broadcast Area.
Wirecast displays Layer 1at the top, Layer 5 at the bottom, and the other layers, in order, between them. The order of layers determines the order of superimposition in the Live Broadcast Area. If you place a video shot on Layer 5 and a title on Layer 1, Wirecast superimposes the title over the video.
See also Viewing a Layer in a Layer Window.
Add Shot Window
The Add Shot window provides a way to add sources, such as live sources, file sources, the Remote Desktop Presenter program, shot graphics, shot audio, and shot templates. To open the Add Shot menu, in a layer, click the plus button  .
When Wirecast displays the Add Shot menu, select a shot category, select the type of shot to add. Modify the shot if desired and allowed. To add a shot to a layer, click the plus button in a layer.
To add a source to the Favorites menu, select the source and click the star icon.
Wirecast changes the color of the star to white and adds the source to the Favorites menu.
Video Capture
System Device
Select a system device.
See NDI Devices in the Shot Layer Properties Tab.
Wirecast Gear Inputs
If you using Wirecast Gear (and have an active license) all available video inputs will be listed. If you are using Wirecast Gear 300/400 series hardware, the Wirecast Gear Video Inputs appear in the Shot Selection menu.
After a WC Gear shot is created, you can set up the shot using Wirecast Gear controls.
Audio Input
Select the audio input (if any) from the pull-down menu.
Audio Capture
System Device
Select a system device.
See NDI Devices in the Shot Layer Properties Tab.
System Audio Capture
Select an audio capture device.
Source Name Displays the name of the source. To change the source name, enter a new one.
Audio Delay Enter the amount of time (in seconds, as short as 1 ms) to delay the audio signal to sync it up with a video source.
Monitor Click the Monitor icon to cause audio to play through your monitor output. The icon is gold when selected (turned on). If unselected, audio will not play through the monitor output for this source. Selected is the default.
ASIO and WASAPI Sources
Select an ASIO audio capture device and click the Add button.
Any ASIO or WASAPI source on your local network will be discovered by Wirecast and listed under Capture Devices in the Source Input Menu. These devices are generally used with multi-track audio outputs. ASIO Audio Capture is a very low latency professional audio capture API. It is used to connect to professional audio interfaces. WASAPI Audio Capture is also a low latency audio capture API. It replaces the old DirectShow-based audio capturing.
Media Files
Select to navigate to a media file.
Stock Media Library
Select to display the Stock Media Library window.
A media file is a video clip or a picture. To open a media file source, select Media Files from the source menu in the shot window, and then navigate to your file. You can also click the Add Media File button at the bottom of the Add Shot window.
Media files have the following settings:
Source Name
Displays the name of the source. To change the source name, enter a new one.
In Point
Click Jump to move the play head to the In Point in the media file. Set the In Point either by dragging the In Point icon to the desired beginning position on the play bar, or by entering a value into the In Point field.
Out Point
Click Jump to move the play head to the Out Point in the media file. Set the Out Point either by dragging the Out Point icon to the desired end position on the play bar, or by entering a value into the Out Point field. The green triangle shows the current location of the Play Head.
When Finished
Select what happens when the media finishes playing. Loop causes the media to begin playing again. Hold causes the media to stop and hold the last frame in the Live Broadcast Area. Remove causes the media to be removed from the Live Broadcast Area when it finishes playing.
Begin playing when media becomes Live
When checked, the media begins playing as soon as it is made Live.
Remember position even when not Live
When checked, the media will always start playing where ever it was playing when it was stopped, even if it was removed from the Live Broadcast Area and made Live again. When unchecked, the media will start from the beginning every time it is taken Live.
Set Default
Click to set the media display to default settings.
Live Playback
Changes are live. When you select this option and your shot is live, Wirecast displays any action you take in the Preview Area--such as playing, pausing or scrubbing--in the Live Broadcast Area, and broadcasts the action live.
Note: If you use this feature to pause or scrub media in the live broadcast, it's usually best to uncheck Begin playing when media becomes live.
When clicked, Stock Media Library opens the Stock Media Library window.
You can toggle on/off any type of media to include in the display: Video, Images, and Audio.
Enter key words to display just the media files including these words. The display is updated as your enter words.
Click the arrows to move to the next or previous set of Stock Media files.
Play button
Click to begin playing the selected media file.
File marker
Move the marker to view the media file quickly.
Download button
Click to download the selected media file into a shot.
See Adding Media Files from the Stock Media Library to a Shot.
Network
iOS Cam
Select an IOS Camera device, or an iOS camera through the Wirecast Go iOS app.
Select to create a new Rendezvous session, or select to reconnect to a previously created session.
Web Page
Creates a new web page shot.
See Web Page Properties.
Web Stream
Creates a new Web Stream shot.
NDI(R) Source
Select any NDI-capable devices on your network.
Web Page shows a web source defined by a web address (URL). To open a web page source, select Web Page from the source menu in the shot window. Web Page Properties have the following settings:
Name
Displays the name of the source. To change the source name, enter a new one.
Audio Delay
Enter the amount of time (in seconds, as short as 1 ms) to delay audio.
Video Delay
Enter the amount of time (in seconds, as short as 1 ms) to delay video.
URL
Displays the web address (URL) of the source. To change the address, enter a new one.
Width/Height
Displays the width and height of the display source. To change the width or height, enter a new value.
Go Back/Go Forward
If you have enabled Interaction on your web page, these buttons allow you to go back or go forward just as you would in a browser.
Transparent Background
Check to make the background transparent in your shot.
Shutdown when inactive
Check to turn off the audio and disable it from the shot when playing videos.
Override CSS
Enter Cascading Style Sheet code to override the default code for this web display.
Interaction
Allows you to choose how you want to interact with your web page in the Preview window. Choices are Never, Always, or On Double-click.
Monitor
Click the Monitor icon to cause audio to play through your monitor output. The icon is gold when selected (turned on). If unselected, audio will not play through the monitor output for this source. Selected is the default.
The Web Stream option allows RTMP, RTSP, MMS, or HTTP streams to be taken directly into Wirecast. This is useful for incorporating remote IP Cameras or other network streams into a broadcast. Sources are automatically detected and are also identified by IP Camera Profile. To open a Web Stream source, select Web Stream from the source menu in the shot window.
Web Stream Properties has the following settings.
Name
Displays the name of the source. To change the name, enter a new one.
Audio Delay
Enter the amount of time (in seconds, as short as 1 ms) to delay audio.
Video Delay
Enter the amount of time (in seconds, as short as 1 ms) to delay video.
URI
Enter the address of your input stream. (For example: rtsp://127.0.0.1:8080/my_stream.sdp, or https://10.0.0.1/my_stream, or rtmp://hades.telestream.net:1935/live/myStream).
Username
Enter your username for your URI stream.
Password
Enter your password for your URI stream.
Buffer
Enter a buffer time in seconds.
Reconnect
Click to reconnect the web stream source.
Apply
Click the Apply button to update any changes.
Timestamps
Select Provided by source, or Provided by Wirecast. This setting allows you to use timestamps embedded in the source, or use timestamps generated by Wirecast. Timestamps are used to synchronize devices. Many sources don't provide completely accurate timestamps, resulting in sources out of sync with each other (i.e. audio and video not syncing).
Select Provided by Wirecast to ignore the timestamps coming from the source, and instead generate new timestamps. However, the risk is that if the system is under a heavy load, the generated timestamps could be impacted, and end up arriving late. The default setting is Provided by source.
See Wirecast: Timestamps Option.
Deinterlacing
Select None, or Blend Fields.
Dynamic Range
Select Default, Full or Limited.
Monitor
Click the Monitor icon to cause audio to play through your monitor output. The icon is gold when selected (turned on). If unselected, audio will not play through the monitor output for this source. Selected is the default.
Screen Capture
Remote Desktop Presenter
Creates a new Remote Desktop Presenter shot.
See Remote Desktop Presenter Properties.
Creates a new screen capture shot of any monitor or window on your computer.
See Screen Capture Properties.
Note: When in screen-capture mode, some apps take control of your mouse and make the cursor invisible. To reduce the capture window size and regain use of your mouse, press Alt + Tab.
Remote Desktop Presenter Properties
The Remote Desktop Presenter (RDTP) is a utility application that enables Wirecast to broadcast the desktop of any computer running the Telestream Desktop Presenter program. To open a Remote Desktop Presenter source, select Remote Desktop Presenter from the source menu in the shot window.
Remote Desktop Presenter is normally auto-detected by Wirecast and is automatically added to the list of sources. However, if a RDTP is not detected, or if you want to add one in a remote location you can manually add it by selecting New Remote Desktop Presenter from the Source menu in the default layout.
Remote Desktop Presenter Properties has the following settings.
Source Name
Displays the name of the source. To change the source name, enter a new one.
Audio Delay
Enter the amount of time (in seconds, as short as 1 ms) to delay audio.
IP Address
Enter an IP address of the target computer.
Enable Audio When checked, the audio from the remote desktop is enabled.
Apply
Click the Apply button to update any changes.
Monitor
Click the Monitor icon to cause audio to play through your monitor output. The icon is gold when selected (turned on). If unselected, audio will not play through the monitor output for this source. Selected is the default.
Screen Capture Properties
A screen capture displays any monitor or window on your computer. To open a screen capture source, select Screen Capture from the source menu in the shot window. Screen captures have the following settings:
Name Displays the name of the source. To change the source name, enter a new one.
Audio Delay Enter the amount of time (in seconds, as short as 1 ms) to delay audio.
Video Delay Enter the amount of time (in seconds, as short as 1 ms) to delay video.
Capture Video Check to enable Capture Type, Show Cursor, and fps settings (described below).
Capture Type Select Monitor (captures your entire monitor), Window (captures the currently selected window), or Game (captures the game currently played on your PC). If you select Game, you can also configure how your game is captured by selecting options offered under Select Window/Monitor (described below).
Anti Cheat Support Enables anti-cheating support for game capture.
Show Cursor Check to show the cursor in your streaming. Uncheck to hide it.
fps Select the FPS, from 10 to 60 frames per second as the capture rate. An FPS of 60 is the best frame rate, but it requires greater streaming bandwidth.
Capture System Audio Check to capture system audio when streaming. Uncheck to mute the audio.
Select Window/Monitor Click the Configure button to display the Select Window dialog. If you selected Game for your Capture Type, Wirecast displays a configuration window with the following options:
–Capture Any Full Screen Game Check this box to automatically capture a game running in a full monitor screen, or running in a full screen of a window.
–Support Multiple Video Cards/SLI Check this box if you have a Windows system with multiple discrete GPUs and are experiencing problems capturing a game. (Performance of the capture may be slower than when running on a single GPU.)
–Capture Third Party Overlays Check this box to capture overlays rendered on top of a game that are generated by applications external to the game. (For example, the Steam in-game overlay.
Choose Audio Device Click the Configure button to display the Select Audio Device dialog, then select an audio device from the drop-down menu.
Note: Some apps, when screen captured, take control of your mouse and the cursor is not displayed. You can, at any time, press Alt + Tab keys to reduce the capture window size and enable you to use your mouse.
Dynamic Range Select dynamic range setting: Default, Full or Limited.
Monitor Click the Monitor icon to cause audio to play through your monitor output. The icon is gold when selected (turned on). If unselected, audio will not play through the monitor output for this source. Selected is the default.
See Screen Capture.
Overlays
Clock
Creates a shot that displays time.
See Clock Properties.
Image Carousel
Creates a new image carousel shot that shows a sequence of images.
See Image Carousel Properties.
QR Code Generator
Creates a QR code display to present to your viewers in a live broadcast.
See QR Code Generator Properties.
Scoreboard
Creates a new scoreboard shot.
Opens a selector for Social Media Titles.
See The Comment Moderation Window, and Social Media Shots.
Text
Creates a new text shot.
See Text Shot Properties.
Opens a dialog for adding titles and lower thirds. In the dialog, you can see the available title designs in a continually growing library of title designs. You can search for a title and filter your search using various criteria. You can preview the intro and outro animation, and you see how the title fits on the screen.
You can revise titles in your project in the Title Properties tab.
If your project contains titles made with earlier versions of Wirecast, those legacy titles continue to appear in your project. To access the legacy titles, click the three dots in the upper-right corner of the Add Source dialog, and choose Display Deprecated Sources. Wirecast displays the names of animated titles with Title... at the beginning. Wirecast displays the names of legacy titles with Title (legacy) at the beginning.
See Titles (Animated) Properties.
Text displays a text phrase. To open a text source, select Text from the source menu in the shot window. Text Properties have the following settings.
Name
Displays the name of the source. To change the Source Name, enter a new one.
Width/Height
Displays the width and height of the display source. To change the width or height, enter a new value.
Mode
Select the source of your text: Text (directly entered) or File (navigate to a text file), or RSS (ticker tape RSS feed).
If you select Text, enter your text in the text box below the source selector.
If you select File, enter a file name in the File Path box displayed, or click the navigation button (three dots) and find your text file. The text from your file will be automatically displayed. The file has to contain UTF-8 encoded text in order for it to be rendered correctly. Only the first 64KB of the text file will be loaded and displayed. You can also check Keep reading text file continuously to keep the text display in your broadcast up to date with file changes.
If you select RSS, enter a URL in the URL box displayed.
Text
Enter text to display.
File
Click the (...) icon to navigate to the file containing text to display.
RSS URL
Enter the RSS URL where the text to be displayed is located.
Update frequency
Enter the number of seconds between updates.
Keep reading text file
Check to keep reading the text file for changes.
Font
Select the desired font used for your messages. If you select Web Font, a Web Font field will display below. You can also select any of the fonts installed on your computer.
Face
Select the font style from the list of combination of bold and italic.
Size
Enter the font size. Click the gear icon to select the type of font size: small, medium, large, etc.
Justify
Enables you to justify the text along the left, center, or right side of the display.
Align
Enables you to align the text at the top, middle, or bottom of the display.
Color
Click the box to open the color selection panel. Select a new text color from the palette.
Wrap
Select wrap mode from the drop-down menu: Word Wrap or Break Wrap.
Scroll
Enter a scroll mode: Non Stop or If it Does Not Fit.
Background
Select Solid, Linear Gradient (line), or Radial Gradient (circle). Click in the color box to open the color palette and select a background color. Click the second color box to select the gradient color. For Linear Gradient, adjust the slider to set the angle of the gradient display.
Shadow
Check to activate the text shadow slider controls. Click the color box to open the color palette.
Angle
Move the Angle slider to adjust the direction (0 to 360 degrees) the shadow text is offset from the actual text.
Offset
Move the slider to adjust the distance the shadow text is offset away from the actual text.
Blur
Move the Blur slider to adjust the amount of blur in the shadow text.
Titles (Animated) Properties
A title is text displayed in a banner window. Wirecast offers a wide variety of animated lower thirds and titles. To open a title source, select Title... from the Add Source menu.
Animated titles have the following settings:
Left/Right arrows
Click to view the previous page, or next page, of titles.
Search
Enter name of title desired.
Filters
Click to open options for filtering your view of the titles.
Scale to Fit/Show Preview
Click to view either the title scaled to the whole screen or placed in its live position.
Tags
Displays identifying tags for the title.
Lines of Text
Displays the number of lines of text in the title.
Custom Colors
Displays the number of custom colors in the title.
Intro Duration
Displays the length of the intro animation.
Animate Intro
Click to preview either the intro animation.
Outro Duration
Displays the length of the outro animation.
Animate Outro
Click to preview the outro animation.
Note: Some title styles have customization sections for Subhead 1 and Subhead 2.
Note: To access legacy titles, in the Add Shot dialog, click the three vertical dots at the top right corner of the box. Then select Show Deprecated Sources.
Legacy titles have the following settings:
Name
Displays the name of the source. To change the Source Name, enter a new one.
Width/Height
Displays the width and height of the display source. To change the width or height, enter a new value.
Mode
Select the source of your text: Text (directly entered) or File (navigate to a text file), or RSS (ticker tape RSS feed).
If you select Text, enter your text in the text box below the source selector.
If you select File, enter a file name in the File Path box displayed, or click the navigation button (three dots) and find your text file. The text from your file will be automatically displayed. The file has to contain UTF-8 encoded text in order for it to be rendered correctly. Only the first 64KB of the text file will be loaded and displayed. You can also check the Keep reading text file continuously to keep the text display in your broadcast up to date with file changes.
If you select RSS, enter a URL in the URL box displayed.
Text
Enter text to display.
File
Click the “...” icon to navigate to the file containing text to display.
RSS URL
Enter the RSS URL where the text to be displayed is located.
Update frequency
Enter the number of seconds between updates.
Font
Select the desired font used for your messages. If you select Web Font, a Web Font field will display below. You can also select any of the fonts installed on your computer.
Face
Select the font style from the list of combination of bold and italic.
Size
Enter the font size. Click the gear icon to select the size of font.
Style
Select any combination of Bold, Italic, All Caps, by toggling each button.
Justify
Enables you to justify the text along the left, center, or right side of the display.
Align
Enables you to align the text at the top, middle, or bottom of the display.
Color
Click the box to open the color selection panel. Select a new text color from the palette.
Wrap
Select wrap mode from the drop-down menu: Word Wrap or Break Wrap.
On Change
Select transition type: Fade, Drop In, Drop Out, and Slide. Enter the length (in seconds) of the transition time.
Scroll
Enter a scroll mode: Non Stop or If it Does Not Fit.
Direction
Select the direction of the scrolling: Top to Bottom, Bottom to Top, Left to Right, or Right to Left.
Speed
Enter the speed (in pixels per second) that you want your message to scroll through the display.
Auto Reverse
When checked, the display reverses the scrolling direction when it reaches the top or bottom of the list.
Background
Select Solid, Linear Gradient (line), or Radial Gradient (circle). Click in the color box to open the color palette and select a background color. Click the second color box to select the gradient color. For Linear Gradient, adjust the slider to set the angle of the gradient display.
Shadow
Check to activate the text shadow slider controls. Click the color box to open the color palette.
Angle
Move the Angle slider to adjust the direction (0 to 360 degrees) the shadow text is offset from the actual text.
Offset
Move the slider to adjust the distance the shadow text is offset away from the actual text.
Blur
Move the Blur slider to adjust the amount of blur in the shadow text.
Scoreboards allow you to add a scoreboard graphic to your broadcast that can be dynamically updated. Multiple scoreboards can be added. Unlike most other elements in Wirecast, changes to the scoreboard go live instantly without requiring a transition. Once the scoreboard is live, the preview image is exactly as it is seen in your broadcast. To open a scoreboard source, select Scoreboard from the source menu in the shot window.
Scoreboards Properties has the following settings.
Source Name
Displays the name of the source. To change the Source Name, enter a new one.
Scoreboard
Select how the scoreboard will look using two drop-down menus. The upper menu selects the scoreboard style: Pipe, Shade, Corner, etc. The lower menu selects how the display fields are laid out: Basic, Right Stats, or Bottom.
Home/Visitor/Score
The Home, Visitor, and Score fields contain the home and visitor team names and their current score. The three icons to the right of these fields control the text alignment, font size, and font color. Click on each icon to open its control window.
BG Color
Sets the background color for the Home or Visitor field display. Click the color icon to open the control window.
+1, +2, +3
Click these score increment buttons to increase the Home or Visitor score display.
Field 1-4
Displays information inside the scoreboard depending on the layout chosen using the scoreboard menus. The three icons to the right of these fields control the text alignment, font size, and font color. Click on each icon to open its control window.
Use a Custom Image
Check to enable the Choose button.
Choose
Click to navigate to the location of your custom image.
Reset
Click to remove a custom image.
Note: Because Wirecast updates the scoreboards dynamically, It is recommended that you fill in the additional information fields while using a layout that hides them. Then, change to a layout that reveals those fields when ready, otherwise your viewers see you typing in those fields live.
There are four keyboard shortcuts associated with the scoreboard.
= | Increments Home score |
- | Decrements Home score |
] | Increments Visitor score |
[ | Decrements Visitor score |
In order for these keyboard shortcuts to be active, the scoreboard must be displayed in the Live Broadcast Area and the Wirecast default layout must be in focus (selected as the active window).
See Application Shortcuts and Document Hotkeys.
A clock shot displays time. Clock Properties has the following settings.
Name
Displays the name of the source. To change the source name, enter a new one.
Clock Modes
Select Clock, Countdown, or Stopwatch.
Clock Mode:
Date Select a date display format.
Time Select a time display format.
Countdown Mode:
Mode Select Countdown from or Countdown to.
Start Time
Enter the time value from which to start counting.
Start/Stop/Resume and Reset
Click Start to start the counter. When counting, click Stop to stop the counter. When stopped, click Resume to start counting again, or click Reset to rest the counter.
Automatically Start
When checked, the counter will start when the shot is taken live.
Format
Select one of the time-display formats from the drop-down menu.
Start, Stop, Reset
Click Start to begin counting down. Click Stop to end counting down. Click Reset to reset clock to Timer value.
At Zero
Select either Stop at 00:00 or Start count up clock.
Stopwatch Mode:
Start, Stop, Reset
Click Start to begin counting. Click Stop to end counting. Click Reset to reset stopwatch to zero.
Display Format
Select time elements to display: Hours, Minutes, Seconds, and Fractional Seconds.
Font
Select font from drop-down menu.
Face
Select face from drop-down menu.
Size
Click the gear icon to select the font size from the menu.
Background
Select Solid, Linear Gradient (line), or Radial Gradient (circle). Click in the color box to open the color palette and select a background color. Click the second color box to select the gradient color. For Linear Gradient, adjust the slider to set the angle of the gradient display.
Shadow
Check to activate the text shadow slider controls. Click the color box to open the color palette.
Angle
Move the Angle slider to adjust the direction (0 to 360 degrees) the shadow text is offset from the actual text.
Offset
Move the slider to adjust the distance the shadow text is offset away from the actual text.
Blur
Move the Blur slider to adjust the amount of blur in the shadow text.
An image carousel shot shows a sequence of images. Image Carousel Properties has the following settings:
Name
Displays the name of the source. To change the source name, enter a new one.
Width/Height
Displays the width and height of the display source. To change the width or height, enter a new value.
Change Every
Sets how often the images are changed, in seconds.
Fade-In Time
Sets how long it takes for each image to fade in, in seconds. Enter zero for instantaneous display of images.
Shuffle Images
Check to shuffle the display order of the images. When unchecked, images are displayed as they are ordered in the image list.
Add/Delete/Move Images
Click the plus (+) button to find and add images. Select an image on the list and click the minus (-) button to delete it. You can move images up and down the list by selecting an image and clicking the up or down arrow.
QR Code Generation has the following settings:
Source Name
Displays the name of the source. To change the source name, enter a new one.
Video Delay
Enter the amount of time (in seconds, as short as 1 ms) to delay video.
Content
Enter the message you want to be embedded in the QR code displayed in your broadcast.
Deinterlacing
Select None, or Blend Fields.
Backgrounds
Web Page
Creates a new web page shot.
See Web Page Properties.
Solid Color
Creates a new solid color shot.
Solid Color displays a solid color background. To open a solid color source, select Solid Color from the source menu in the shot window. Solid Color Properties has the following settings:
Name
Displays the name of the source. To change the Source Name, enter a new one.
Width/Height
Displays the width and height of the display source. To change the width or height, enter a new value.
Background
Select Solid, Linear Gradient (line), or Radial Gradient (circle). Click in the color box to open the color palette and select a background color. Click the second color box to select the gradient color. For Linear Gradient, adjust the slider to set the angle of the gradient display.
Templates
Select Templates from the Add Shot menu.
When Wirecast displays the Templates window, select a template.
Wirecast displays the new template shot in the Shot Editor.
•Placeholder Shot
See Assigning Media to Placeholders.
A Virtual Set is a pre-built source set, complete with graphics, that simulates a news-anchor set. For example, you can select a virtual set that displays three layers of decor with two live sources. You can use virtual sets as they are, or you can customize them to meet your needs.
Virtual Sets has the following setting.
–Source Name Displays the name of the source. To change the source name, enter a new one.
The Shot Editor Window
The shot editor has six tabs: Shot Layers, Shot Layers Properties, Audio Properties, Video Filters, Smooth Transition Properties, and Source Properties.
Shot Layers Tab
Enables you to add and delete sources and to change the order of layering within the shot. The Shot Layers tab lists all of the layers in the shot.
Note: Source icons appear only when you hover over them.
See Adding, Deleting, or Rearranging Layers in a Shot.
You can display shot layers in small, medium, or large sizes, by clicking the respective shot-sizing button  at the bottom-left of the Shot Layers tab.
The replay layer is a placeholder layer that can be added to any shot for the purpose of creating a replay template shot. Once the shot is selected in Replay Settings, it can be used as a template for any created replay shot.
See Creating a Replay Shot from a Layer.
Shot Layers Properties Tab
Enables you to change the size, position, and other properties of a shot. The various controls on the Shot Layer Properties tab are described below.
Position
Displays the position of the selected source in your shot. Position “0 0” represents the middle of the shot area. To move a source, enter new location values.
Size
Displays the size of the selected source in your shot. To resize a source, enter new size values.
 Gear button
When clicked, Wirecast lets you select how to size the bounding box: by pixels or by percentage.
Scale Jog Wheel
When the jog wheel is dragged left or right, Wirecast changes the scale of the bounding box.
 Scale to Fit Button
When clicked, Wirecast expands the source to its maximum size on the canvas. This might distort the display of the source depending on the option selected in Fill.
See Fill.
 Reset Position Button
When clicked, Wirecast restores the source to its original scale and rotation.
The Fill drop-down menu offers these ways to fill the bounding box with the image:
• Lock Aspect Ratio fills the bounding box until one side hits an edge. Respects the aspect ratio, and doesn’t crop the image.
• Lock and Fill Width fills the bounding box to its width. Respects the aspect ratio. If the bounding box height is less than the image height, the top and bottom of the image are obscured. If the bounding box height is greater than the height of the image, Wirecast displays the image letterboxed.
• Lock and Fill Height fills the bounding box to its height. Respects the aspect ratio. If the bounding box width is less than the image width, the sides of the image are obscured. If the width of the bounding box width is greater than the width of the image, Wirecast displays the image pillar-boxed.
• Stretch to Fill fills the bounding box. Does not respect aspect ratio. If the image dimensions don’t match the bounding box dimensions, the image is distorted.
Note: The Fill feature is not active in Clock, Text, Solid, QR Code or Web Page shots. In these shots the image automatically stretches to fill the bounding box.
X Y Z Rotation
Slide the X (Horizontal), Y (Vertical), or Z (Straight-through) axis sliders to rotate the source.
See Reset, under Crop.
Opacity
Slide the Opacity slider to adjust the degree of transparency of your image.
Reflection
Slide the Reflection slider to adjust the degree of reflection below your image.
The border controls enable you to add a border around a video layer, and to control the parameters of the border.
Note: When a smooth transition is applied, Wirecast interpolates the values of the border group over the transition period.
Wirecast applies the matte before applying any border, feathering, corner radius, or cropping. Then, Wirecast applies any cropping.
Finally, Wirecast applies the border, feathering, and corner radius parameters.
Descriptions of the border controls follow.
•Width The Width slider controls the thickness of the border, in pixels. Wirecast places the border around the rectangle of the layer. The border doesn’t follow the edges of an input in an alpha channel, such as content in a chroma key.
•Align Type lets you determine where to align the border: with Inner the border cuts into the content, with Center the border sits across the center of the layer bounds, and, with Outer, the border sits outside the bounds.
•Color sets the color of the border with a standard color picker. The default is white, which provides the greatest contrast with the black background.
•Corner Radius specifies the radius of the corners from 0% to 100%. The corner mask hides the corners of the layer. This control works independently from the Width slider. You can apply the corner mask to any layer, regardless whether a border width has been specified.
•Feather specifies the amount of feathering, from 0% to 100%. Feathering provides an alpha ramp around the edges of the layer. This control works independently from Width and Corner Radius. Feathering smooths edges. You can use feathering to generate a vignette effect on a layer.
•Matte A matte is a mask over a shot. Select a matte by clicking the down-arrow on the Matte menu. The default is No Matte. You can also use any media file as a custom matte. To do this, create a new shot of the media file you want to use as a matte. This file now appears in the Matte drop-down menu where you can select it.
Clicking the Crop triangle opens the cropping adjustment pane. Slide the Left, Right, Top, and Bottom sliders to crop your source image.
• Gear button When clicked, Wirecast opens a menu of adjustment increments, allowing you to adjust the crop parameters either by a number of pixels or by percentage.
•Reset When clicked Wirecast resets the crop controls to their default settings.
Color
When clicked Wirecast opens the color adjustment pane. Slide the color controls to adjust the color.
•Reset When clicked, Wirecast resets the color controls to their default settings.
Drop Shadow
Click the Drop Shadow triangle to open the Drop Shadow adjustment pane. Check the checkbox to enable the controls.
•Color Click in the color field to open the color palette. Select a shadow color and luminance by sliding the vertical and horizontal sliders. Click outside the color edit box to close the palette.
•Angle Move the Angle slider to adjust the direction (0 to 360 degrees) the shadow text is offset from the actual text.
•Offset Move the slider to adjust the distance the shadow text is offset away from the actual text.
•Opacity Slide the Opacity slider to adjust the degree of transparency of your source.
•Blur Size Move the slider to adjust the amount of blur in the drop shadow.
•Use As Defaults Click to set the current drop shadow configuration as the default setting. All future enabled drop shadows will be set this by default. Clicking this button does not retroactively update previously created shots. Drop shadow settings on individual shots still can be changed.
•Reset Click to restore the drop shadow settings back to the default values. You can also restore the drop shadow settings to Wirecast application defaults by holding the Shift key down and clicking Reset.
PTZ
Click the PTZ triangle to open the PTZ control panel.
•Preset Check the Preset box to select a PTZ preset.
• Up-arrow and down-arrow buttons Click the up and down arrows to find a PTZ preset to recall.
• Right-pointing arrow button Click the right-pointing arrow button to apply the PTZ preset.
•Show PTZ Controller Click to display the PTZ Controller panel.
See The PTZ Controller Panel and How to Scale a Shot.
PTZ Control in the Shot Layer Properties Tab
You can select PTZ Controller presets associated with a shot layer video source from the Shot Layer Properties tab of the Preview Inspector. You configure PTZ Control Presets in the PTZ Controller Panel.
To expand the PTZ control panel, click the PTZ triangle. To enable preset recall, check the Enable box. To select a preset, enter a preset number or click the up/down arrow buttons. Click the Go button (right pointing arrow) to cause the associated PTZ camera to recall that preset.
Once you have configured a shot layer with a PTZ Preset, sending that shot to preview recalls the preset for the camera. If multiple shots share the same video source with different PTZ Presets configured, the shot which is currently live takes precedence over subsequent PTZ Preset recall actions, until you drop the shot from the live feed.
When you enable Preset, clicking Show PTZ Controller opens the PTZ Controller panel.
See Shot Layers Properties Tab.
NDI Devices in the Shot Layer Properties Tab
If you have selected an NDI source, the NDI Source Properties tab will display. In addition to the controls above, an NDI source has the following controls:
Video Delay
Enter the amount of time (in seconds, as short as 1 ms) to delay video.
Bandwidth
Select the bandwidth to use: Highest (max quality), Lowest (max efficiency), or Audio Only (video bandwidth not applicable).
GPU Decoding
When checked, incoming sources will use your GPU to process the incoming source.
Timestamps
Select Provided by source, or Provided by Wirecast. This setting allows you to use timestamps embedded in the source, or use timestamps generated by Wirecast. Timestamps are used to synchronize devices. Many sources don't provide completely accurate timestamps, resulting in sources out of sync with each other (i.e. audio and video not syncing).
Select Provided by Wirecast to ignore the timestamps coming from the source, and instead generate new timestamps. However, the risk is that if the system is under a heavy load, the generated timestamps could be impacted, and end up arriving late. The default setting is Provided by source.
Deinterlacing
Select None, or Blend Fields.
Dynamic Range
Select Default, Full or Limited.
Monitor
Check the Monitor check box to cause audio to play through your monitor output. If the check box is unchecked, audio will not play through the monitor output for this source. Checked is the default.
Note: NDI networking requires that your network has port 5353 open for mDNS device discovery, as well as one port per video channel (starting from port 5960 and onward) transmitted by an NDI source, plus one additional port for messaging.
Audio Properties Tab
The Audio Properties tab enables you to control and monitor audio. You can set the audio level, mute and monitor the audio, and map channel outputs.
Volume
Adjust the slider to set the audio volume level.
Pan
Adjust the slider to pan between left and right audio.
Meter
Monitors the audio level. You can also mute the audio by clicking the audio icon.
Speaker Icon
Click to mute the audio output. Icon turns gray when muted. Click the icon again to un-mute the audio.
Channels
Select left (L) or right (R) for each channel. Adjust volume slider for each.
Apply to All
Click to apply the current settings to every instance of the selected source. If you have any shot specific configurations in other shots, they will be changed to match what was configured when you click this button. This action cannot be undone!
Set as Default
Click to take the current settings and set them as the default configuration. Any time this source is added to a shot in the future, it will be created with this configuration.
Reset
Click to reset the default settings. This is useful if you have made changes to the default custom settings, but want the defaults set back to the factory default settings. Factory defaults are: Chan 1 = Left; Chan 2 = Right; additional channels are unassigned.
Click to open the audio mapping window. Check a square to map an audio channel to an audio track. Any audio can be tracked to any or all tracks. However, you will typically assign a group of channels to one track and other groups to other tracks.
If you have created a shot using a 16 input device, the mapping window will display all 16 channels.
Note: Although SDI supports 16 discrete audio channels, Wirecast Pro video out currently only supports two channels.
The audio track that is actually used is selected from the Audio Track Selection menu in the Output Settings window. You can select only one track. However, if you are recording, you can select multiple audio tracks.
Video Filters Tab
Enables you to configure video filter settings for a shot on a layer.
Plus (+) Button
When clicked, Wirecast opens a menu of filter selections. Selecting a filter opens a control panel for the filter selected, described as follows:
Chrome key enables you to replace all areas of a selected color with a background image. For example, you can replace the green in a traditional background green screen with an image. The image appears in the background instead of the color green.
The Chroma Key Properties tab enables you to turn chroma keying on or off, and to make chroma key adjustments. Check the Use box and+ select the type of use: Chroma, Luma, or Color Key.
Color
Click the color square to open the Color Pallet. Select a color to use as the chroma key color and click OK. Click the dropper icon to use your mouse to select a chroma key color from your screen. Hover over the a desired color in the selected source, and click the left mouse button to select that color. All adjustments will be made using the selected color as the key.
Key Threshold
Move the slider to adjust how far away from your chosen chroma color you want to enable keying. The farther right you move the slider the more variation to the color it accepts.
Black Clip
The Black Clip slider allows you to define what is considered “black”. When slider is fully left, you have a very thin definition of what black is. The farther to the right you go, you start adding more cases of what we consider “black'”. In chroma key, rarely do you want to bump the far left side to the right.
White Clip
The White Clip slider allows you to define what is considered “white”. Slide both all the way to the right, for a very thin definition of white. The more you increase the range, the more you add to what you consider to be full intensity brightness. In chroma key, rarely do you want to bump the far right side to the left.
Spill Suppression
This slider says: anything that is near green, bump it away from green. Move this slider to help take away the green reflection it locates on an edge. This will take everything that's green, and take away its greenness.
Solidify
This slider says: if all the pixels around me seem to be part of the key, then bump up my probability of being part of the key. This tends to “solidify” your key. Move the slider to the right to bump up the alpha values for pixels surrounded by high alpha values. One disadvantage is that the hair on a subject may appear more “blocked” in nature.
Edge Coloring
Move the slider to adjust the level of edge coloring which pull colors from inside of keyed object to get rid of halo on an image.
Display
Select display: result of keying, white-alpha channel, or black-alpha channel. This can be helpful to get key parameters set correctly.
This lets you key based on its brightness (or Luma value). You have an icon with a white background - and you want to get rid of the white background.
Black Clip
The Black Clip slider sets the minimum and maximum black luma values for keying. A range is used so there is a smooth transition from foreground to background.
White Clip
The White Clip slider sets the minimum and maximum white luma values for keying. A range is used so there is a smooth transition from foreground to background.
Edge Coloring
The Edge Coloring slider sets the amount of edge coloring.
Display
When clicked, Wirecast opens a drop-down menu showing available display options, as follows:
–Result The Preview window displays the image resulting from applying the filter.
–Alpha Channel: White The Preview window displays the white alpha channel.
–Alpha Channel: Black The Preview window displays the black alpha channel.
This lets you set the image alpha based on the distance from a given color in the RGB space. This is useful for images (logos) that have non-black and non-white backgrounds. If the BG is black or white use Luma Key. If it's a plate from a greenscreen/bluescreen then use Chroma Key. Otherwise, try Color Key.
Color
The color picker enables you to choose the color of the key.
Alpha Clip
The alpha clip slider lets you choose the minimum and maximum values of the alpha clip. A range is used so there is a smooth transition from foreground to background.
Edge Coloring
The Edge Coloring slider sets the amount of edge coloring.
Display
When clicked, Wirecast opens a drop-down menu showing available display options, as follows:
–Result The Preview window displays the image resulting from applying the filter.
–Alpha Channel: White The Preview window displays the white alpha channel.
–Alpha Channel: Black The Preview window displays the black alpha channel.
You can use blur effects on all sorts of sources, including text. For example, you can create a text blur effect to hide details of a window or website.
Radius
When dragged left or right, the Radius slider increases or decreases the radius of the blur filter.
Applies Pan, tilt, and zoom controls to an existing clip, emulating PTZ controls on a live camera.
Applies the Background Removal filter to a clip. Select one of the following from the Mode drop-down menu.
–Remove Removes the clip background, replacing it with the image behind the clip
–Small Blur Blurs the clip background a little.
–Blur Blurs the clip background much.
See Removing a Background from a Shot.
Amount
When dragged left or right, the Amount slider increases or decreases the amount of the LUT filter Wirecast applies.
LUT File
When clicked, Wirecast opens a drop-down menu of available LUT files.
See Adding a Custom LUT Filter.
Customize
When clicked, Wirecast opens a folder containing LUT customization information.
See Applying a Video Filter to a Shot and Adding a Custom LUT Filter.
Smooth Transition Properties Tab
Enables you to set transition properties.
The Smooth Transition Properties tab provides control over how objects (image, movie, title, etc.) are added or removed in the Live Broadcast Area. Wirecast performs motion only during a Smooth transition. If you are using any other transition, the motion settings are ignored.
There are two types of motion. When an object is added to your broadcast it is called Build In; When it is removed it is called Build Out. Motion only occurs when an object enters or leaves the Live Broadcast Area. For example, if you have two shots, each with a foreground and the media in the foreground is the same, then a Smooth transition is performed between the foregrounds. However, no motion is performed. Or, if a logo is positioned in the top left corner in an existing shot, and it is in the bottom right corner in a new shot, when you make the new shot Live the logo smoothly transitions from the top left corner to the bottom right corner. But the Build In and Build Out settings are ignored.
However, if you have two shots with a Foreground, but the media in each is different, the Build Out is performed for the existing shot, and the Build In is performed for the new shot.
Direction Menus
These provide selections of where the Build In comes from (top, bottom, right, etc.) when it is added, and where the Build Out goes when it is removed.
Fade In / Fade Out
Checking these checkboxes causes an object to be added or removed gradually. If unchecked, the object is instantly added or removed, much like a cut transition.
Spin In / Spin Out
Checking these checkboxes causes an object to be added or removed in a spinning fashion.
Scale In / Scale Out
Checking these checkboxes causes an object to be added or removed in a scaled fashion.
Apply To All
Click this button to make the Transition Settings the same for all sources in a shot. This is useful if you want to make all of your motion the same for all of the elements in the shot.
Set As Default
Click this button to make these Transition Settings the default settings for all new shots. These default settings will be applied in all future WC documents.
Source Properties Tab
Enables you to set properties for a source in your shot. Each source in a shot can have its own video filter settings. The selected filters are applied to the source wherever the source is used.
Note: The title of the Source Properties tab changes with the type of shot selected. For example, when you select a playlist shot, the title of the Source Properties tab becomes Playlist Properties.
The Source Properties tab provides control over clip properties and behaviors. When a playlist is selected, the Source Properties tab also provides playlist controls.
See also Playlist Controls and Playlist Properties Tab.
Name
Clip filename, editable.
In Point/Jump
Enter the timecode for the in-point desired. Click Jump to bring the playhead to the in-point.
Out Point/Jump
Enter the timecode for the out-point desired. Click Jump to bring the playhead to the out-point.
When Finished
Options in the drop-down menu determine Wirecast behavior when the live clip is done playing, as follows:
Loop | Hold | Remove |
|---|---|---|
With no options checked Wirecast replays the clip from its beginning. | With no options checked Wirecast holds on the last frame. If it’s an audio-only clip, Wirecast holds on silence. | With no options checked Wirecast drops the clip from the live playback window. |
With Begin playing when media becomes Live checked When the clip goes live, Wirecast plays the clip from the clip beginning. | With Begin playing when media becomes Live checked When the clip goes live, Wirecast plays the clip from the clip beginning, and holds on the last frame. | With Begin playing when media becomes Live checked When the clip goes live, Wirecast plays the clip from the clip beginning to the end, then drops the clip from the live playback window. |
With Begin playing when media becomes Live and Remember position even when not Live checked When the clip goes live, Wirecast plays the clip, starting after the last frame previously played. | With Begin playing when media becomes Live and Remember position even when not Live checked When the clip goes live, Wirecast plays the clip, starting after the last frame previously played, and holds on the last frame. Wirecast doesn’t restart the clip until you uncheck this option. | With Begin playing when media becomes Live and Remember position even when not Live checked When the clip goes live, Wirecast plays the clip, starting after the last frame previously played, to the end. Then Wirecast drops the clip from the live playback window. |
With Begin playing when media becomes Live, Remember position even when not Live, and Live Playback: Changes are live checked Note: When you check Live Playback: Changes are live, it is usually best to uncheck Begin playing when media becomes Live and Remember position even when not Live. | With Begin playing when media becomes Live, Remember position even when not Live, and Live Playback: Changes are live checked Note: When you check Live Playback: Changes are live, it is usually best to uncheck Begin playing when media becomes Live and Remember position even when not Live. | With Begin playing when media becomes Live, Remember position even when not Live, and Live Playback: Changes are live checked Note: When you check Live Playback: Changes are live, it is usually best to uncheck Begin playing when media becomes Live and Remember position even when not Live. |
With Begin playing when media becomes Live, and Live Playback: Changes are live checked Note: When you check Live Playback: Changes are live, it is usually best to uncheck Begin playing when media becomes Live and Remember position even when not Live. | With Begin playing when media becomes Live, and Live Playback: Changes are live checked Note: When you check Live Playback: Changes are live, it is usually best to uncheck Begin playing when media becomes Live and Remember position even when not Live. | With Begin playing when media becomes Live, and Live Playback: Changes are live checked Note: When you check Live Playback: Changes are live, it is usually best to uncheck Begin playing when media becomes Live and Remember position even when not Live. |
With Remember position even when not Live checked When the clip goes live, click Play. Wirecast plays the clip, starting after the last frame previously played. | With Remember position even when not Live checked When the clip goes live, click Play. Wirecast plays the clip, starting after the last frame previously played, holds on the last frame, and doesn’t restart until you uncheck this option. | With Remember position even when not Live checked When the clip goes live, click Play. Wirecast plays the clip, starting after the last frame previously played, to the end. Then Wirecast drops the clip from the live playback window. |
With Remember position even when not Live, and Live Playback: Changes are live checked Note: When you check Live Playback: Changes are live, it is usually best to uncheck Begin playing when media becomes Live and Remember position even when not Live. | With Remember position even when not Live, and Live Playback: Changes are live checked Note: When you check Live Playback: Changes are live, it is usually best to uncheck Begin playing when media becomes Live and Remember position even when not Live. | With Remember position even when not Live, and Live Playback: Changes are live checked Note: When you check Live Playback: Changes are live, it is usually best to uncheck Begin playing when media becomes Live and Remember position even when not Live. |
With Live Playback: Changes are live checked When checked, Wirecast lets you control the playback with the tools in the Preview window. Note: When you check Live Playback: Changes are live, it is usually best to uncheck Begin playing when media becomes Live and Remember position even when not Live. | With Live Playback: Changes are live checked When checked, Wirecast lets you control the playback with the tools in the Preview window. Note: When you check Live Playback: Changes are live, it is usually best to uncheck Begin playing when media becomes Live and Remember position even when not Live. | With Live Playback: Changes are live checked When checked, Wirecast lets you control the playback with the tools in the Preview window. Note: When you check Live Playback: Changes are live, it is usually best to uncheck Begin playing when media becomes Live and Remember position even when not Live. |
Set as Default
Click to make the current source properties the default source properties.
Source Filters Plus (+) button
When clicked, Wirecast opens a drop-down menu of available video filters.
See Applying a Video Filter to a Source.
Playlist Properties Tab
The Playlist Properties tab contains the following settings for playlist shots:
Name
An editable field for the name of the playlist.
When Finished
Sets the behavior of the playlist when the last shot in the list has been played. A check mark indicates what menu item (behavior) is selected.
•Loop transitions back to the first shot, endlessly.
•Hold stays on the last shot. If the last shot is a clip, the last frame in the clip is displayed. If the last shot is a live shot, the live source stays active. If the last shot in a Playlist is a video clip Shot, it will obey the rules set for the video clip in the Media Properties Inspector tab under Source Properties. However, it will hold the Playlist on that last Shot if Set Playlist Behavior is set to “Hold”. Therefore, if you want to see the last video in the Playlist pause on the last frame, you must set When Finished to “Hold” under Source Properties, in addition to setting the playlist behavior to “Hold”. If you set When Finished to “Loop”, under Source Properties, the last video in the Playlist will continue to loop.
•Available Shots transitions to another shot on the same layer. All available shots are listed as menu selections. (In the example shown, the only available shot is “Logo”.)
•Previous Live Shot transitions back to the shot that was live before the playlist began playing.
•Current Preview transitions the contents of Preview to the Live Broadcast Area.
Transition
Sets the transition to use when switching between shots.
Remember position when not live
When selected, Wirecast remembers the start frame for the playlist when the playlist isn’t live.
Previous
Transitions to the previous shot in the playlist if the playlist is currently live.
Next
Transitions to the next shot in the playlist if the playlist is currently live.
Shuffle
Click to shuffle the order of the playlist shots.
Total Shots
Displays the total number of shots in the playlist.
Duration
Displays the duration of the playlist.
See also Source Properties Tab.
The Shot Menu
You can change almost all the attributes of a shot through the shot menu. To open the shot menu for a shot, right-click on the desired shot in a layer.
Wirecast displays the shot menu.
Change Source Select Change Source to change the video source of your shot. Upon selection, a menu of sources will display enabling you to make a selection.
Change Audio Select Change Audio to change the audio source of your shot. Upon selection, a menu of audio sources will display enabling you to make a selection.
Keyboard Shortcut You can create a keyboard shortcut for opening the shot. To do this, select Keyboard Shortcut from the shot menu. Then, select a menu number to associate with that shot.
Wirecast checks that menu item and adds the keyboard shortcut number in the shot icon.
To take a shot using the assigned hotkey, press the number key assigned to that shot.
You can assign multiple shots to the same menu number as long as they are on different layers. When you use the assigned hotkey all the shots assigned to it will be taken. Selecting a checked menu item will uncheck it and unassign the shot.
Select Unmap All Keys to remove all hotkey assignments.
See also Creating a Document Hotkey.
Edit Shot You can edit a shot by clicking the double arrows (located on the left side of the Preview Area) to the right, revealing the shot editing panel. You can also edit a shot by double-clicking on it, by right-clicking it and selecting Edit Shot, by selecting Edit Shot from the Edit menu, or by selecting it and pressing the Ctrl+E keys.
Rename Shot You can rename a shot by right-clicking it and selecting Rename Shot, or by selecting Rename Shot from the Edit menu. You can also rename a shot by selecting it and pressing the Ctrl+R keys.
Duplicate Shot You can duplicate a shot by right-clicking it and selecting Duplicate Shot, or by selecting Duplicate Shot from the Edit menu. You can also duplicate a shot by selecting it and pressing the Ctrl+D keys.
Duplicate Shot Options Check a source to create a new instance of it when duplicating the shot containing it. Multiple selection is allowed.
Delete Shot You can delete a shot by right-clicking it and selecting Delete Shot, or by selecting Delete Shot from the Edit menu. You can also delete a shot by selecting it and pressing the Ctrl+Backspace keys.
Save Shot as Template You can configure any shot with a Placeholder and save it as a Template Shot. When the dialog box displays, enter a template name and click OK.
Lock Shot Icon Click to take a snapshot of your live shot icon thumbnail and save it as a static image for your shot. This can help users identify each shot with a snapshot image that's meaningful for them. For example, if you have a PTZ camera with multiple shots configured for different camera positions, you can display a customized snapshot of each camera angle as the icon for each shot. This provides quick identification during production. Once a shot icon is locked, the Gear menu item will turn into Unlock Shot Icon.
Refresh Shot Icon Click to refresh the shot icon after any changes made.
The Preferences Dialog Box
You can customize Wirecast functionality with the settings in the Preferences dialog box.
See Customizing Wirecast with Preferences.
You can customize whether Wirecast shows the landing page and last document on startup, the number of transition buttons shown, and other defaults, through the General preferences.
When checked, the last document you used is opened when Wirecast starts up.
When checked, the Welcome screen is displayed when Wirecast starts up.
Show Number of Viewers
When checked, enables the viewership indicator while streaming.
Send diagnostic and usage information
When checked, causes diagnostic and usage information to be sent to Telestream anonymously.
Hide Unlicensed Features
When checked, Wirecast hides unlicensed Pro features from display in the menus.
The value selected from the drop-down menu determines the number of transition controls buttons Wirecast displays in the default layout.
Maximum Reconnect Attempts
The number entered into this field determines the number of times Wirecast tries to reconnect to a host provider. The default is three.
The device selected from the drop-down menu determines the device Wirecast uses for monitoring audio playback.
Stock Media Download Folder
This field displays the full path of the folder where Wirecast stores stock media downloads. Clicking the Browse button lets you select a different folder for stock media downloads.
This field displays the full path of the folder where Wirecast stores your snapshots of the Live Action Area. Clicking the Browse button lets you select a different folder for snapshots.
See Snapshot Button.
Canvas Preferences
Canvas preferences let you set options for your document canvas, including the default size and the display rate used for video rendering.
Canvas Size for New Documents
The preference selected from the drop-down menu determines the default canvas size for new documents.
Note: To optimize the quality of the video that Wirecast broadcasts, set the canvas size to match, as closely as possible, the resolution of the desired output.
Lock Aspect Ratio When Resizing Layers
When checked, maintains aspect ratio when resizing layers.
Enable Snapping to other layers
When checked, turns on snapping to selected layers.
Enable Snapping to canvas
When checked, turns on snapping to the canvas.
Show Z Rotation controls
When checked, Wirecast displays the Z Rotation controls.
Video Display Rate
The preference selected from the drop-down menu determines the frame rate displayed on the canvas.
Note: To optimize resources, set this as closely as possible to the framerate of the desired output. The framerate you set is the framerate that Shot ISO and Multiviewer use automatically.
Shot Display Preferences
Shot Display preferences enable you to change settings related to your shots and the Main Shot Display.
Theme
The preference selected from the drop-down menu determines how Wirecast displays the shot window.
•Default: Displays shot icons normally.
•Lighter: Displays the Main Shot Display area with a lighter background.
•XKeys: Displays shot icons with shot titles highlighted.
•XKeys - Layer Backgrounds: Displays shot icons with colored backgrounds.
Display hotkeys using
When clicked, Wirecast opens a drop-down menu displaying the following options:
Key Combination
When checked, Wirecast displays the key combination on the shot.
Hotkey Name
When checked, Wirecast displays the hotkey name on the shot. Live GPU Accelerated Icons
The preference selected determines the framerate at which Wirecast displays the active icons.
Note: Higher framerates place greater demands on your CPU. This could diminish Wirecast performance.
Live Audio Meters
When checked Wirecast enables live audio meters.
When Dragging Multiple Files From ExplorerFolder
The preference selected determines what Wirecast does when you drag multiple files from a folder into Wirecast. Depending on your selection, Wirecast either creates a playlist containing the multiple files, or Wirecast creates multiple shots that are not part of a playlist.
Each layer contains one or more shot-selection icons.
The shot icons can be made to display any live activity in the source it represents, such as cameras or streaming.
See Creating a Shot and Shot Display Preferences.
cenLises Preferences
Licenses preferences enable you to register and license Wirecast.
This field displays the serial number that you have received for Wirecast.
Note: The serial number is composed of numbers and upper case letters (excluding upper case letter O), but it never contains quotation marks. When you receive a serial number, it may be enclosed in quotation marks (e.g., “123-456-789”).
Purchase
When clicked, the Purchase button launches the purchasing dialog.
Deactivate
When clicked, the Deactivate button deactivates the serial number.
Update Preferences
Software update preferences enable you to obtain Wirecast updates.
Automatically check for updates
When checked, Wirecast checks for updates on the Telestream Website each time Wirecast is launched. No personal information is transferred to Telestream during this action.
Check Now
When clicked, Wirecast immediately checks for updates on the Telestream Website (telestream.net). Wirecast does not transmit personal information to Telestream during this action.
See Checking for Wirecast Updates.
Shortcuts Preferences
Shortcut preferences enable you to view and create application shortcuts and document hotkeys. An application shortcut is a combination of keys that executes a menu or mouse command. A document hotkey is a combination of keys that executes a document-specific command.
See Finding an Application Shortcut and Finding a Document Hotkey.
The Shortcuts tab of the Preferences dialog contains the following elements:
List of Keyboard Shortcuts
The Keyboard Shortcuts window displays a list of existing keyboard shortcuts.
“+” Button
When clicked, this button creates a new line item, in the list of shortcuts, that you can edit to create a keyboard shortcut.
“-” Button
When clicked, this button deletes the line item and keyboard shortcut selected in the list of keyboard shortcuts.
Name
Text entered into this field names the keyboard shortcut selected in the list of keyboard shortcuts.
Key Binding field (unlabeled)
Wirecast makes the key combinations entered into this field keyboard shortcuts.
Global checkbox
When checked, Wirecast makes the key combinations entered into this field global.
See also Creating a Document Hotkey.
Controllers Preferences
Controllers preferences enable you to adjust MIDI and X-keys controller settings for Wirecast.
Controller
The controller selected from the drop-down menu controls Wirecast.
See Installing a Hardware Controller.
Each MIDI controller has up to six controls assigned to it. The locations of each of these controls are shown below for the three midi controllers supported.
The locations of APC MINI controls are shown below:
The locations of APC40mk2 controls are shown below:
The locations of Launchpad MK2 controls are shown below:
Each MIDI controller has up to six controls assigned to it. The locations of each of these controls are shown below for the three midi controllers supported.
Shot Layers
The matrix of buttons on the MIDI controller (five rows of eight buttons) automatically correspond to the five layers in the Wirecast shot list window. Up to eight shots in each layer are controlled by the MIDI controller buttons. Shots are automatically assigned to MIDI controller buttons as they are created. If fewer than eight shots exist on a layer, the corresponding buttons (to the right) are inactive.
Go Live
Pressing this MIDI controller button is the same as clicking the Go Live button in the Wirecast default layout.
Transition 1
Pressing this MIDI controller button is the same as clicking the Left Transition button in the default layout.
Transition 2
Pressing this MIDI controller button is the same as clicking the Left Transition button in the default layout.
Audio Mixer Volumes
Sliding these MIDI controls adjusts up to eight volume controls in the Wirecast Audio Panel. Each MIDI slider corresponds (left to right) to a volume control in the Audio Panel. Volume controls are automatically assigned to MIDI controller sliders as they are created. If less than eight volume controls exist in the Audio Panel, the corresponding MIDI sliders (to the right) are inactive.
Channel Pan
Each Channel Pan control on a MIDI device corresponds with a Channel Pan control for a track in the Audio Mixer Panel, for as many as eight channels.
Wirecast automatically assigns Channel Pan controls to MIDI controls as they are created. If fewer than eight Channel Pan controls exist in the Audio Panel, the corresponding MIDI controls remain inactive.
The X-keys controller has multiple controls assigned to it. All of the assigned controls are shown below.
•Key lamps turn red when a function is on, and turn blue when off (except for keys that do not have dual states, like the Keyboard Shortcuts).
–Function lamps turn red when a function is on, and turn blue when off (except for keys that do not have dual states, like the Keyboard Shortcuts).
–Shot switching key lamps turn Blue when shot is in Preview and Red when in Live. Otherwise they are off.
•The Wirecast software and the X-keys panel stay in sync when keys are pressed or changes are made in Wirecast.
•Some keys are interactive. In such a case, pressing one key affects the status of another (like the PREV and LIVE keys).
Controls the first twelve shots (plus the Clear Layer shot) on each of the five layers.
Keyboard Shortcuts
The twelve keys represent the twelve Keyboard Shortcuts that have been assigned in Wirecast. Pressing a key executes the matching numbered Keyboard Shortcut (1 through 13). The key lamps momentarily turn red, then turn back to blue.
Live/Preview Swap Mode
Toggles the Live/Preview Swap mode. When in this mode, the Live and Preview shots are swapped.
Auto Live Mode
Toggles the Live Auto mode. When in this mode, selected shots are displayed in the Live Output window immediately.
Rendezvous
Toggles (show/hide) the display of the Rendezvous window.
Audio Mixer
Toggles (show/hide) the display of the Audio Mixer window.
Preview Monitor Audio
Toggles the Preview monitor audio (what you hear locally) on and off. (It is mutually exclusive with Live Monitor audio).
Mute Live Streaming audio
Toggles the Live Streaming audio (what your viewers hear) on and off.
Live Monitor Audio
Toggles the Live monitor audio (what you hear locally) on and off. (It is mutually exclusive with Preview Monitor audio).
Streaming
Toggles streaming on and off.
Recording
Toggles recording on and off.
ISO Recording
Toggles ISO recording on and off.
Multi Viewer
Enables all displays. Pressing this key is the same as selecting Output > Multi-Viewer Output > Enable All Displays.
NDI
Enables/Disables NDI output.
Fade to Black
Pressing this key acts as a “master transition-to-black”. The transition used is the one currently selected. It is very helpful when needed to make the Live Output black in an emergency. If Wirecast is in Live/Preview Swap mode, the live shot is moved to Preview and the pre-fade condition can be restored by pressing the Go key.
Live Media Play and Pause
Press the Play button to play a selected media file, and press the Pause key to pause it. These keys are interactive. Pressing one changes the lamp status of the other.
Replay Create and Update
These keys execute Replay+ISO > Create All Replay Shots, and Replay+ISO > Update All Replay Shots.
Mark In
Pressing this key executes Replay+ISO > Program Replay > Replay Mark In.
Transitions 1 and 2
These keys select Transition 1 or Transition 2 so that when the Go key is pressed, the selected transition will occur.
Go
Press this button to send the shot from the Preview Area to the Live Broadcast Area, by way of the transition selected. If Wirecast is in the Live/Preview mode, the Live output shot will be moved to the Preview Area when you click the Go button.
Advanced Preferences
Advanced preferences enable you to adjust advanced settings for Wirecast.
Disable Vertical Sync
Check the box when running Wirecast minimized, when the Wirecast user interface is covered by another application, or when Wirecast is covered by a full-screen game.
Video Adapter
Select the desired video adapter from the drop-down menu.
Render Engine
Select the desired render engine from the drop-down menu. The options are as follows:
•Automatic This is the default setting. When this option is selected, Wirecast selects the best render engine based on the available hardware.
Note: Wirecast automatically sets the render engine to Direct3D 11 when it detects AMD hardware. Also, Wirecast automatically sets the render engine to Direct3D 11 when Direct3D 12 is not available.
•Direct3D 12 Select this option to make Direct3D 12 the default render engine.
•Direct3D 11 Select this option to make Direct3D 11 the default render engine
When checked, Wirecast receives frames as fast as possible, for example, during video game play. This is especially useful when the application window is minimized or covered by another application.
The preference selected from the drop-down menu determines the video adapter Wirecast uses for rendering and compositing. If you are using a discrete GPU, select the same GPU on which your application is running.
Note: Video Adapter defaults to the first discrete card that is discovered by Wirecast. If you have multiple GPUs, it is best to configure Wirecast to use the same card as used for your application (for optimal performance), otherwise Wirecast uses a slower capture path. Also, best performance is achieved by setting the Video Adapter to use the NVidia card.
Web Stream
Check to enable automatic discovery of ONVIF cameras.
Microphone
Check to automatically detect feedback and force the display of a warning message.
Missing Media
Check to automatically reconnect live shots when Wirecast loses communications with a source.
The value entered into this field determines Wirecast latency period, in microseconds. When you update this value, Wirecast applies it as soon as the preference is committed. You don’t need to restart Wirecast to see the change.
The minimum value for this preference is 50ms (2 frames @ 30fps). The maximum value is 330ms (10 frames @30fps). The default is 100ms (3 frames @ 30fps).
Note: Wirecast applies application source latency to all sources, while the audio delay and video delay values in Source Properties determine the delay for individual sources.
The drop-down menu allows you to select any supported language for the Wirecast user interface. The default is System Default, which is the language of the operating system on which Wirecast is installed.
See Choosing the Wirecast Language.
Missing Media Image
The preference selected determines how Wirecast indicates a missing graphic.
•When Default is selected, Wirecast presents a red question mark in place of the missing graphic.
•When Transparent is selected, Wirecast makes no replacement of the missing graphic.
•When Custom is selected, Wirecast lets you browse to a graphic to replace the missing graphic.
•Browse button: click to browse to a media image.
The Audio Mixer Window
The Audio Mixer enables you to monitor and control all of the audio sources from a single control panel. This section describes in detail how to use the Audio Mixer.
The Audio Mixer separates your audio by hardware and shot. The Live Sources pane shows all hardware audio sources that are live in your streaming event. This includes microphones, audio input feeds, cameras, capture cards, and Web streams. The remaining audio controls are associated with specific shots.
See Displaying or Hiding the Final Mix Audio Panel.
The Headphone Mute buttons  toggle the source audio when monitoring Preview or Live output. Muting headphones doesn’t remove the audio from the output stream or recording. Channel Selection enables you to select left source only, right source only, or stereo (left and right).
FX
Click the down-arrow to display the audio effects pane.
Add New FX (+)
Click the plus (+) icon to select an audio effect from the drop-down menu. You can select more than one effect or plugin.
Level Controls
Adjust the audio levels.
Level Display
Displays the levels (left and right) of the live audio outputs.
Live Output Audio Level Control
Adjusts the audio level of the Final Mix audio output.
Final Mix Pane
Displays the levels (left and right) of the Final Mix audio outputs.
Final Mix Mute
Mutes the Final Mix audio output.
Headphone Mute
Toggles the monitor audio output in the headphones without effecting the Final Mix audio output.
Audio Playback Selection
Click the down arrow to select an audio playback device from the drop-down menu.
Audio Track Selection
Click the down arrow to select an audio track from the drop-down menu.
For information about the assignment of audio channels to audio tracks see The Multi-Track Input Mapper.
Note: Although SDI supports 16 discrete audio channels, Wirecast Pro video out currently supports only two channels.
The Add FX (+) Drop-Down Menu
The Add FX (+) drop-down menu lists available sound effects, as follows:
De-ess
Thresh sets the threshold of de-essing. Freq selects the frequency at which de-essing will be applied to the audio. HF Drive adjusts the high frequency aspect of de-essing.
Delay
L and R Delay adjusts how much delay on each channel. Feedback is how much delay is used. Fb Tone is a frequency setting of highs and lows to be delayed. FX Mix is how much delay will be added to audio output. Output sets the delay output level.
DubDelay
Opens the DubDelay dialog which allows you to set the parameters of DubDelay.
Dynamics
Thresh sets the threshold of engaging compression. Ratio sets the compression ratio. Output sets the compression level. Attack sets the manner in which compression is applied. Release sets how compression in released. Limiter sets a max output level on the audio. Gate controls (Thresh, Attack, and Release) sets the noise gate that cuts off noise at the set level. Mix adjusts how much compression is applied to the audio.
EQ
Low, medium, and high adjusts low, mid, and high frequency components in the audio.
Limiter
Thresh sets the minimum threshold of limiting in the audio. Output sets the amount of limiting used in the audio. Release sets the manner in which limiting is released as the audio decreases. Attack sets the manner in which limiting is applied. Knee adjusts the frequency and shape of point where limiting begins.
Loudness
Loudness adjusts the amount of loudness (raising high and low frequencies) in the audio. Output adjusts how much loudness is applied to the audio.
Multiband
Listen selects which part of the frequency spectrum to hear: low, mid, high, or all (output). L<>M adjusts the cutoff frequency in the low to mid range (87 to 1020 Hz). M<>H adjusts the cutoff frequency in the mid to high range (111 to 19606 Hz). L, M, and H Comp adjusts the compression for low, mid, and high frequencies. L, M, and H Out adjusts the output for low, mid, and high frequencies. Attack sets the manner in which compression is applied. Release sets the manner in which compression is released. Stereo adjusts how the left and right channels are separated (width) from 0 to 200%. Process selects stereo or mono mode.
Noise Reduction
Amount sets the amount that noise reduction is applied.
The Output Settings Window
The Output Settings window enables you to customize the settings for a destination.
Destination List
Wirecast lists the last-used destinations in the left-side pane of the Output Settings window.
Add Button
When clicked, the Add button opens the Select an Output Destination dialog, enabling you to add destinations to the destination list.
Remove Button
When clicked, the Remove button opens the Select an Output Destination dialog, enabling you to remove destinations from the destination list.
Name
This is an editable field for the name of the output setting. By default, Wirecast names the setting for the destination selected.
Destination
This drop-down menu lists all the visible existing destinations. Each destination has its own broadcast technology preset, for example RTMP, or Windows Media.
See Multicast and Unicast Destination Settings.
More Button
This button opens a menu listing all existing destinations, with check boxes for making each destinations visible in the Destinations drop-down menu.
First Gear Icon
This drop-down menu lists actions available for the destination selected.
Encoding
This drop-down menu lists the available encoding presets. Each destination preset has its own encoding presets. The encoding presets define the codec, aspect ratio, and frame rate for each destination. Wirecast provides many encoding presets.
Second Gear Icon
This drop-down menu enables you to view the details for the preset selected, create a new preset, or filter the presets listed for the destination selected.
Audio Track Selection
This drop-down menu lists the audio tracks available for the destination selected.
This button opens the Multi-Track Input Mapper for the destination and track selected.
See The Multi-Track Input Mapper.
Address
This editable field contains the network address for the destination selected.
Port
This editable field contains the port address for the destination selected.
Passphrase
This editable field contains the passphrase for the destination selected.
Stream ID
The name of the stream. 512 character limit. Some servers require this. When you send multiple SRT streams to a server, the Stream ID helps identify each individual stream to the server. Stream ID lets a client identify itself, and state its intent, such as send/receive or live/file. Servers can use Stream ID to identify resources and user-password access methods while using the same service port number for multiple purposes.
Location
This field displays the host location for the destination selected.
See Selecting a Destination and The Encoder Presets Window.
Multicast and Unicast Destination Settings
You can select Multicast or Unicast from the Destination drop-down menu in the Output Settings dialog. Multicast lets you broadcast to multiple computers simultaneously. Unicast lets you broadcast to a specific computer.
During multicast, the broadcasting computer identifies each data stream individually. This enables recipients to choose between the available multicast streams.
The multicast protocol uses separate unique identifiers for video and for audio. These are not TCP/IP addresses, though they might look like TCP\IP addresses.
See The Output Settings Window.
Facebook Live Destination Settings
You can select Facebook Live from the Destination drop-down menu in the Output Settings dialog. Facebook Live lets you broadcast to Facebook live.
Tags
Wirecast posts any Facebook Live tags entered in this field to Facebook with the output video. Facebook Live tags make videos easier to find on Facebook. As you type in the Tags field, Wirecast searches the list of authorized Facebook tags and displays tags matching your query.
See The Output Settings Window and Modifying Facebook Live Destination Settings.
The Multi-Track Input Mapper
The Multi-Track Input Mapper window enables you to determine the output audio channel destination for each of the audio tracks in a Wirecast document.
Source
Wirecast displays the filename of the audio source in the Source field.
Channel
Wirecast displays the output audio channels available in the Channel fields.
Track (1-8)
Wirecast displays checkboxes for each of the available audio tracks in the Track columns.
See Map, Mapping Audio Tracks to Output Audio Channels, and Mapping Audio Mixes to Playback Devices.
The Encoder Presets Window
The Encoder Presets window enables you to select a default encoder preset for your output, and to create your own custom presets.
Encoder Preset
This drop-down menu lists all default and custom encoder presets available.
Video Encoding
When checked, Wirecast enables you to customize the video encoding settings shown in the Video Encoding pane.
Note: You should match the output to the canvas size as closely as possible to preserve video resolution and quality. For example, a 800x600 source results in significant loss of quality if an aspect ratio of 640x480 is selected for the output. Choosing an output of 720x576, which is much closer in size, helps preserve video quality.
Many encoder presets enable you to select one of three profiles: Baseline, Main, or High.
Baseline Profile (BP) Baseline profile is primarily for low-cost applications that require additional data loss robustness. This profile is used in some video conferencing and mobile applications. It includes all features supported in the Constrained Baseline Profile, plus three additional features used for loss robustness (or for other purposes such as low-delay multi-point video stream compositing). The importance of this profile has faded somewhat since the definition of the Constrained Baseline Profile in 2009. All Constrained Baseline Profile bitstreams are also considered to be Baseline Profile bitstreams, since these two profiles share the same profile identifier code value.
Main Profile (MP) The Main profile is used for standard-definition digital TV broadcasts that use the MPEG-4 format as defined in the DVB standard. It is not, however, used for high-definition television broadcasts, since the importance of this profile faded when the High Profile was developed in 2004 for that application.
High Profile (HiP) The High profile is the primary profile used for broadcast and disc storage applications, particularly for high-definition television applications. For example, this profile is used by the Blu-ray Disc storage format and the DVB HDTV broadcast service.
Audio Encoding (AAC)
When checked, Wirecast enables you to customize the AAC audio encoding settings shown in the Audio Encoding pane.
See Encoder Presets and Encoder Presets.
The Comment Moderation Window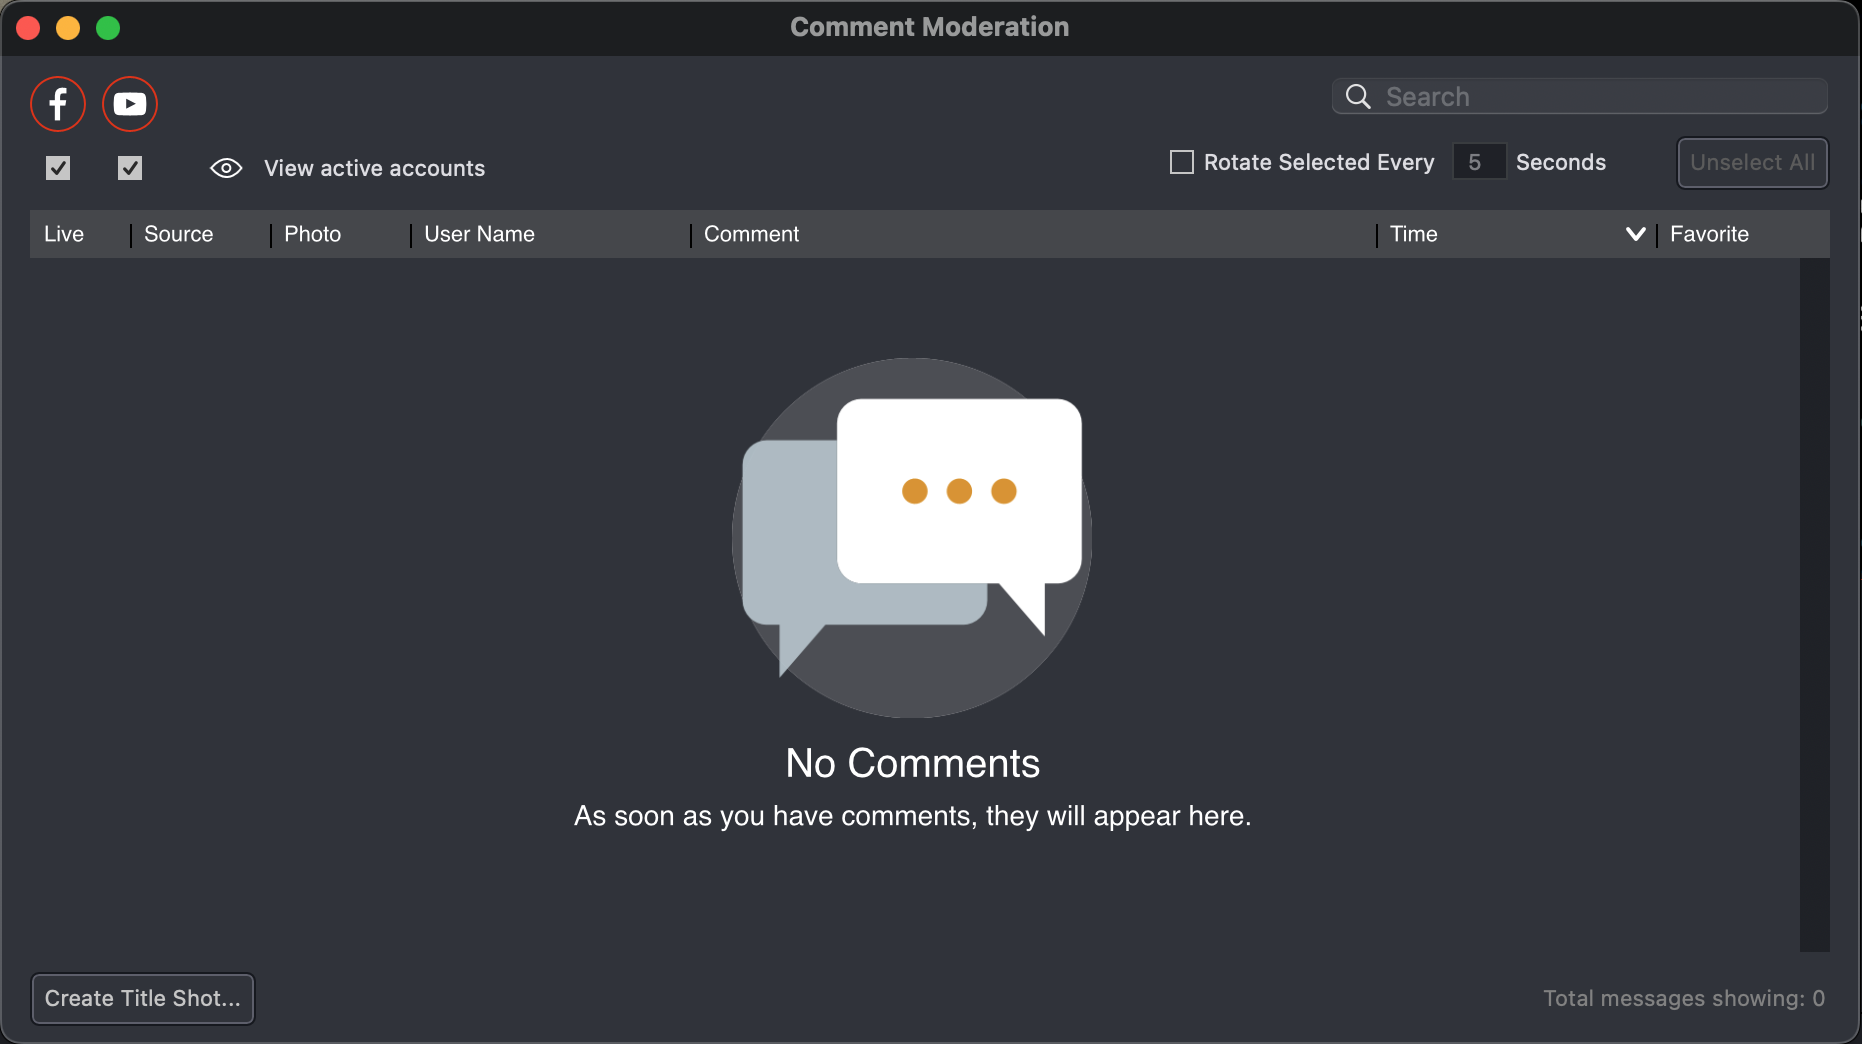
Descriptions of the controls in the Comment Moderation window follow.
Facebook and YouTube Logos
The colored ring around a logo indicates the status of the Wirecast connection to that platform, as follows:
Red
Not reading comments
Note: Until you start live streaming, Facebook and YouTube icons remain red.
Green
Connected and reading comments
Green with a yellow exclamation warning
Connected, but with a potential issue.
Turn off/on comments
Click the checkbox under any of the three platforms to turn off reading comments for that entire platform.
Note: If you have more than one stream going to a platform (e.g. Facebook profile and Facebook group), this control turns off comments to all of the streams on that platform. There is not currently a way to turn off comments from individual streams to the same platform.
Click this to see which accounts you have authenticated, and what their status is. This opens the Active Accounts pane on the Comment Moderation dialog.
• For Facebook or YouTube:
– If the Account is Authenticated but you have not yet started streaming, or you have unchecked it from the main Moderation window it will say Offline
– If the account is authenticated and you are streaming, the message will say Reading Comments
•View Comments When clicked, Wirecast opens the View comments pane.
•Add Facebook or YouTube Feed When clicked, Wirecast opens the Select destination pane.
Search
Lets you search the text within comments
Rotate Selected Every XX Seconds
Check this option and all comments selected will rotate into the selected title and displayed. Click Unselect All to deselect any comments you have selected.
Comment panel
Comments appear as they come in from each selected platform. An asterisk “*” indicates the column can be sorted.
•Live The comments that are selected to rotate, if Rotate Every is selected, or the comment that is currently selected for live display
•Source The platform the comment came from
•Photo The photo of the commenter
•User Name The name of the commenter
•Comment The comment
•Time The time the comment was made on the platform
•Favorite To mark a comment as a favorite, click the star icon in the Favorite column for the comment.
Note: Colored rectangles showing amount paid appear in the Favorite column for super-chat comments.
When you click the Favorite header, Wirecast sorts the comments with super-chat comments at the top, followed by favorite comments, followed by the rest of the comments.
See Social Media Shots, Moderating Social Media Comments, and Moderating Facebook or YouTube Comments for a Streaming Computer or RTMP Server.
The PTZ Controller Panel
In this panel you can create a preset group of settings for each camera listed in the Camera drop-down menu. You can associate multiple presets for each camera. Also, you can switch between devices in the Camera drop-down menu.
Camera
This drop-down list shows cameras available to Wirecast. Selecting a camera updates the PTZ Controller window to display the preset VISCA and PTZ configuration for that camera. Once you establish a connection to a valid VISCA device, the PTZ Controller panel shows the camera's current Pan/Tilt orientation. Changing the Camera source changes all the settings in the panel accordingly.
Note: A PTZ camera's VISCA configuration is discrete from the video feed. You can associate any available video source with any manually-entered VISCA device information. This accommodates a workflow where the camera's video feed is being captured via a Capture Card.
Protocol
Select a PTZ protocol from the drop-down menu.
IP Address
Enter the IP address of a valid VISCA-over-IP source on the network. This IP address is configured in your camera's network settings.
Port
Enter the IP port for the VISCA connection of the camera. This IP port is configured in your camera's network settings.
VISCA Address
Select the correct VISCA Address of the camera. This VISCA Address is configured in your camera's VISCA settings.
Status / Reconnect Button
Displays the current VISCA connection status (“connected” or “invalid source”) of your camera. Click the Reconnect button to force a reconnection.
Home Button
Click the House icon to reorient the PTZ camera to its default position (default centered, no zoom).
Pan/Tilt
Select the desired pan/tilt control method (Map, D Pad, or Analog Pad) from this drop-down menu.
•Map – displays an X/Y plane with a yellow cross-hair representing the current Pan/Tilt orientation of the camera
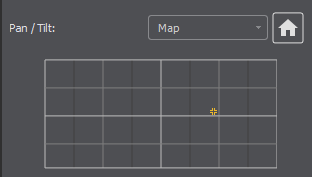
•D-Pad – Pan the camera by clicking the left and right arrows, and tilt the camera by clicking the up and down arrows.
•Analog Pad – Click in the analog circle to reposition the camera pan and tilt.
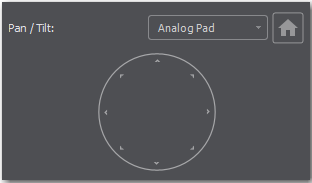
Zoom
Move the slider to adjust the zoom factor of your camera.
Note: When the PTZ Controller panel is the selected window, you can press the arrow keys on the keyboard to adjust the Pan (left and right arrow keys) and Tilt (up and down arrow keys) of the camera. Alternatively the W, A, S, and D keys can also be used (W = Up, A = Left, S = Down, D = Right)
Focus
Click the “+” Plus and “-” Minus buttons to adjust the focus of the camera. The yellow button in the center toggles auto-focus on and off. Any manual adjustments made to the focus will automatically disable the auto-focus.
Exposure
Select the exposure mode from the Exposure drop-down menu.
•Shutter Move the slider to adjust the shutter of the camera. You can only adjust the Shutter when Exposure mode is not in auto-focus.
•Iris Move the slider to adjust the iris of the camera. You can only adjust the Iris when Exposure mode is not in auto-focus.
Note: Refer to PTZOptics documentation for more details about each mode.
White Balance
Select the white balance mode from the White Balance drop-down menu.
Note: Refer to PTZOptics documentation for more details about each White Balance mode.
One Shot
When the White Balance mode is set to One Shot, click this button to adjust the White Balance one time only.
Red Gain/Blue Gain
When not in auto-focus mode, you can use these sliders to adjust the red and blue gain of the video signal to compensate for white balance issues.
Presets
Enter a preset number and click Save to save current Pan, Tilt, and Zoom configurations of camera. To recall a preset, select a preset number by clicking the arrow buttons, then click the Recall button.
Note: If you have Wirecast in the AutoLive mode, you must click the Live button to switch between presets on the same PTZ camera. This is a built-in safeguard against unintentionally moving the camera while in Live mode.
See Configuring The PTZ Controller, Opening the PTZ Controller Panel, and Controlling a PTZ Camera.
Menus and Application Keyboard Shortcuts
You can launch most Wirecast features from the items in the Wirecast menu bar. When a menu item is clicked, Wirecast opens a drop-down menu of features related to that menu item.
Also, you can launch most Wirecast features with application keyboard shortcuts. Application keyboard shortcuts are key combinations assigned to the Wirecast menu commands.
Note: To view a complete list of the default application keyboard shortcuts, see Finding an Application Shortcut.
File Menu
Note: To view a complete list of the default application keyboard shortcuts, see Finding an Application Shortcut.
New
Creates a new, empty Wirecast document.
Open
Displays the Open dialog window for opening a Wirecast document.
Open Recent
Displays up to fifteen of the most recently accessed documents. Every time a document is opened or saved it is entered into this list.
Import Media
Enables you to import media into Wirecast. A new shot is automatically created using the new media.
Save
Saves the document. If the document has not already been saved, the Save As... dialog window is displayed.
Save As
Displays the Save As... dialog window so that the document can be saved using a new file name.
Close Window
Closes the currently active Wirecast window. If the window is a document, all of its Shot Editor windows are closed as well. If Wirecast is still broadcasting, you are asked to stop the broadcast. If the document has not been saved, you are asked to save the document before closing.
Opens the Preferences dialog. If the Preferences dialog already is open, it becomes the active window.
See The Preferences Dialog Box, Customizing Wirecast with Preferences, and Resetting Preferences.
Exit
Closes all documents and then exits. If the broadcast is playing, you are asked to stop the broadcast. If a document has not been saved, you are asked to save the document before exiting.
Always On Top
When checked, the Wirecast window remains active as the topmost open window on your system.
Edit Menu
Note: To view a complete list of the default application keyboard shortcuts, see Finding an Application Shortcut.
Undo
Reverses your last change in Wirecast. Undo is only available in some windows (such as the Preview Area). Wirecast offers an unlimited number of undo actions (within computer memory limitations). Undo information is stored on a per-window basis. Also, if you close a window then reopen it, your undo information is lost.
Redo
Reverses your last undo action. Redo is only available in some windows (such as the Preview Area). Wirecast offers an unlimited number of redo actions (within your computer’s memory limitations). Redo information is stored on a per-window basis. Also, if you close a window then reopen it, your redo information is lost.
Cut
Cuts selected text.
Copy
Copies selected text to clipboard.
Paste
Pastes selected text from clipboard to location of cursor.
Paste as new Consolidated Shot
Pastes selected shots into one consolidated shot. A consolidated shot is a shot created from multiple sources.
Select All
Selects all text in the active window.
Edit Shot
Opens the Shot Editor. You can also double-click a shot, or right-click and select Edit Shot, to open the Shot Editor.
Rename Shot
Enables you to rename a shot. You can also right-click a shot and select Rename Shot.
Duplicate Shot
Duplicates the currently selected shot. You can also right-click a shot and select Duplicate Shot.
Duplicate Shot Options
Check a source to create a new instance of it when duplicating the shot containing it. Multiple selection is allowed.
Delete Shot
Deletes the currently selected shot. You can also right-click a shot and select Delete Shot.
When clicked, Wirecast offers these options:
–Lock All Locks all three options: Main Layers, Preview, and Shot Editing
–Unlock All Unlocks all three options: Main Layers, Preview, and Shot Editing, regardless of state. For example, if one option is locked and another option isn’t, Unlock All results in both being unlocked.
–Lock Main Layers Locks the Main Layers window.
Disables layer reordering.
Disables shot reordering on a layer or between layers.
Disables layer resizing.
Prohibits adding new shots and removes the Add button.
Removes gear icon on shots, so that you can’t assign hotkeys, lock shot icons, delete shots, rename shots, duplicate shots, or change sources on a shot.
Note: When the main layers are locked, you still can create a replay shot, and add it to the Main layers.
When locked, the layer-reordering icons on the far left of each layer are replaced by one lock icon on a background that spans the vertical space of all the layers.
–Lock Preview Locks the Preview window.
Prohibits any movement, rotation or resizing of any sources or layers directly in the preview window.
Turns off resize handles.
Turns off rotate handles.
When locked, Wirecast displays a lock icon displayed under the lower left corner of the Preview window.
–Lock Shot Editing Locks the Shot Editor panel.
Prohibits any changes to settings on any of the Properties panels, including: cropping, resize, add/delete/reorder shot layers, chroma-key on/off, audio volume/pan changes, adding/updating source or layer filters.
Prevents changes to text.
Disables all controls, except disclosure triangles and the PTZ Open button
When shot editing is locked, Wirecast displays a lock icon to the left of the title of the Shot Editor panel.
Move To Layer
Moves a shot to the selected layer. When shots are created, they are assigned to a specific layer. They exist on that layer until they are moved or deleted. You can also click and drag a shot to another layer.
See Locking Layers, Preview, or the Shot Editor.
Switch Menu
Note: To view a complete list of the default application keyboard shortcuts, see Finding an Application Shortcut.
Go
Performs a transition (same action as clicking the Go button).
Transitions
Wirecast has up to three transition controls buttons that can be assigned any transitions (cut, smooth, etc.) that Wirecast supports. The Switch menu lists the currently assigned transitions by name. You can also select the Left, the Middle, and the Right transitions by pressing the control key and either the 1 or 2 key. Right-click on either transition to open the operation menu. Select how the transition will operate: Ease In, Ease In/Out Ease Out, Linear, or I.
To select which transitions appear in this menu, see Final Mix Audio Panel.
Transition Speed
Enables you to select one of five transition speeds ranging from Slowest to Fastest.
When clicked, Manage Stinger Transitions opens the Manage Stinger Transitions dialog. This enables you to import and use custom transitions that employ transparent backgrounds. These transitions are typically created using applications such as Adobe After Effects, Apple Motion or ScreenFlow.
See Importing Stinger Transitions.
Toggles (turns on and off) the AutoLive feature.
You may want to single-click a shot to make it become live. Alternatively, you may want to make several changes to a shot before making it live. You can use either method in Wirecast.
When enabled, the AutoLive feature lets you broadcast any shot with a single click. When AutoLive is enabled, Wirecast disables the Go button. Clicking a shot in a layer automatically places the shot in the Live Broadcast Area.
See Single-Click Switching with AutoLive and Go Button.
Live/Preview Swap
Toggles (turns on and off) the Live/Preview Swap feature. When on, the Live Broadcast and Preview windows trade panes (swap) when the Go button is clicked.
Layer Visibility
Click to open the menu and select a layer to hide or show in your shot. A check mark displays when the layer is visible. The shot icon becomes gray when not visible. You can toggle on and off the viability of each layer by pressing the Alt+1 through Alt+5 keys.
Disable PTZ Preset Recall
Enables/Disables PTZ preset recall.
Note: When you transition to a shot containing an animated title, Wirecast first executes the transition, and then performs the opening animation for the title. When you clear the title from the shot, Wirecast first performs the closing animation for the title, and then executes the transition for the end of the shot.
Media Menu
Note: To view a complete list of the default application keyboard shortcuts, see Finding an Application Shortcut.
Start Playing All Movies
Starts playing any movies that are not currently playing.
Pause All Movies
Pauses all movies that are currently playing.
Shuffle Playlist
Randomly rearranges the order of media in the playlist.
Assign Placeholder
Opens the Assign Placeholder menu.
Reset Placeholder
Opens the Reset Placeholder menu.
Show Asset Manager
Displays devices that can be configured. Some devices (cameras, etc.) may be configurable. For example, you can configure a USB camera to manually change its focus, contrast, brightness, etc. Other devices have multiple inputs you can choose (AlchemyTV Card, etc.).
See Remapping Media Locations.
Note: The Configure Devices menu selection is present only if a device is connected to Wirecast. The configuration user interface is provided by the device maker. It is beyond the scope of this document to describe all of the features available for all devices. See the documentation provided with your device on how to configure it.
Output Menu
Note: To view a complete list of the default application keyboard shortcuts, see Finding an Application Shortcut.
Output Settings
Opens the Output Settings window.
Start/Stop Broadcasting
Starts (or stops) broadcasting to the network.
Start/Stop Recording
Starts (or stops) recording to disk. If you have not yet configured the Output Settings for this document, you are prompted to do so.
Show Recordings
Opens all the folders of all the file directories in the Output Settings.
Enables you to setup and use a Multi-Viewer display on and or all monitors. You can configure your displays, enable all displays, select a display to be active, or show (or hide) all displays when the application is in the background.
See External Display Outputs and Multi-Viewer Output.
Configure Displays
Select Configure Displays to open the configuration window.
Setup your Multi-Viewer by choosing a Monitor which determines where the Multi-Viewer will display. Also select the Mode: Multi-viewer, Live Output, or Disabled (neither).
Select a Layout which determines how the Multi-Viewer will be displayed. The layout choices are: one, two, or four slots. In the Pro version ten or seventeen slots can also be selected. Each panel slot can then be mapped to any source: Preview, Live or any existing Shot in your document. Click inside a panel to select a source. Each Monitor is configured separately using the Configuration window. So, when you select a different monitor, the configuration panel (slots) also change. Additionally, all the monitors are automatically numbered. Clicking the Identify Displays button causes each of the monitors to display it number on it.
You can also control how each panel is labeled by making a selection from the Labels menu:
Draw Labels Below each Slot
Displays the label below each shot in each panel.
Superimpose Labels Over Each Shot
Displays the label over each shot in each panel.
Do Not Draw Labels
No labels are displayed.
Click on any slot panel to open the source menus, then select a source from the list to display it in the slot. Click Identify Display to cause the display number on each display to be shown.
Enable/Disable All Displays
Select to hide or display all of your configured Multi-Viewed monitors.
Select a Display
Select one of your configured Multi-Viewed monitors to hide or display. Shown below is a typically configured monitor with four slots. Audio meters are provided in each view.
Hide All Displays When App is in the Background
When selected, all Multi-Viewer Displays are hidden if Wirecast itself is put into the background or minimized. Turning this option off allows the Multi-Viewer outputs to stay on if Wirecast is put in the background or minimized
Note: Multi-Viewer displays can also be disabled by clicking on the Multi-Viewer display itself (on its target monitor), and then pressing the Escape (Esc) key.
Sends the live program to a secondary device. For example, you can send a live program feed to another screen or to a capture card in an external device. If the external device has an UVC HDMI capture card, you can capture the live output from Wirecast for use in the applications--such as Zoom or Teams--on the other device.
You can use Secondary Display Live Output as an alternative to Virtual Camera/Mic.
You can map audio tracks, as well as video, to the secondary display.
See External Display Outputs and Multi-Viewer Output.
Virtual Camera Out
Enables you to present the output of Wirecast as if it were a camera (a virtual camera), allowing it to be automatically detected by other applications when they are launched. Outputs only the Live Program feed.
Active Broadcast
Once you have logged into your YouTube or Twitch account and you start streaming, you can select Active Broadcast to display the YouTube broadcast window in a browser.
Control Room (YouTube only)
Once you have logged into your YouTube account, you can select Control Room to display the YouTube control room window in a browser.
Dashboard (Twitch Only) Once you have logged into your Twitch account, you can select Dashboard to display the Twitch dashboard window in a browser.
VOD of Last Broadcast Enables you to view the most recent completed broadcast.
Note: Active Broadcast is enabled only for Live Broadcast and YouTube, Control Room and VOD of Last Broadcast are enabled only when you are logged into YouTube.
Facebook (Facebook Live Only)
Select Active Broadcast to display your Facebook Live event.
To stop your broadcast click the Stop Stream button.
•Toggle Broadcast Click to toggle between Go Live and Stop Broadcast on the Producer Dashboard.
Canvas Size
Sets the canvas size resolution used when broadcasting a Wirecast document.
Note: You should match the output to the canvas size as close as possible to preserve video resolution and quality. For example, a 800x600 source results in significant loss of quality if a resolution of 640x480 is selected. Using 720x576, which is much closer in size, helps preserve video quality.
Show Statistics
Displays the statistics window for your broadcast. You can select (for display): Bitrate, RTMP Queue Size, Framerate, System CPU Usage, and System Memory Usage.

NDI Output
Sends the output of the Live Program feed. Select the output resolution for your NDI output. You can also select a link that will take you to NDI.NewTek.com for additional information.
Note: Although SDI supports 16 discrete audio channels, Wirecast Pro video out currently only supports two channels.
Blackmagic Cards
Note: If you are updating to Wirecast 14 (or a previous version) and have multiple capture cards that are different models, when you open a saved document that contains sources from the capture cards, one of the inputs may fail to upgrade (and will show their saved source.) To remedy this re-add the missing source back into the document, then open the Asset Manager and assign that newly added source to back into its saved shot.
You can use Blackmagic cards to send live feeds directly into editing, effects and broadcast design systems. In order to use this feature, install a Blackmagic card with associated drivers, then restart Wirecast. The Blackmagic card with then be listed in the Output menu.
Under the Output menu, select a Blackmagic card, and then select an HD setting for its output. If your card has multiple outputs, you can select more than one and all will output simultaneously at independent resolutions and Frame rates.
To begin outputting, select Start Output and chose a setting.
You can stop the Blackmagic card output by selecting Stop Output. If you have multiple outputs selected, they will all stop outputting.
Note: Some Blackmagic cards do allow input and output simultaneously, but need to be configured in the Blackmagic software.
Layout Menu
Note: To view a complete list of the default application keyboard shortcuts, see Finding an Application Shortcut.
To optimize the user interface for each document, you can configure the Wirecast layout.
Wirecast enables you to select which functions are displayed in the default layout. These functions are added or removed from the default layout using the Layout menu.
Final Mix
When checked, displays the Final Mix Audio controls. Final Mix Audio controls are located on the left and right sides of the default layout.
Show Live and Preview
When checked, displays the Live and Preview windows, and allows you to select between displaying the Preview Area only, the Live Broadcast Area only, or both.
Show Preview Only
Displays the Preview Area only.
Show Live Only
Displays the Live Broadcast Area only.
Note: The three controls above work the same as the Mode Control buttons at the top-right of the default layout.
See Layers.
Zoom Layers In
Increases the size of all the layer icons.
Zoom Layers Out
Decreases the size of all the layer icons.
Zoom Layers To
Sets the size of all the layer icons to: 50%,100%, or 200%.
Note: You can also change each layer size by clicking and dragging the divider line between layers. Additionally, you can change the size of all layers by holding the Ctrl key while clicking and dragging the divider line between layers.
Go to Layer
Displays the selected layer. You can also press Ctrl + Shift keys with the T, F, N, B, or A keys to select a layer. Each of these letter keys represents a layer name: Title, Foreground, Normal, Background, and Audio.
Replay + ISO Menu
Note: To view a complete list of the default application keyboard shortcuts, see Finding an Application Shortcut.
Start All
Activates the Create Replay Shot system. When activated, the menu item becomes Deactivate. Click Deactivate to deactivate the Create Replay Shot system.
Activate
Activates the Create Replay Shot system. When activated, the menu item becomes Deactivate. Click Deactivate to deactivate the Create Replay Shot system.
Configure ISO Outputs
Once ISO outputs are created, all ISO outputs are listed in this menu. To configure an ISO output, click Configure, then click the Add ISO button.
Note: You can create ISO recordings of any source or shot in your document.
Replay Mark All
Allows you to tighten up your Replay Shot capture. Select Replay Mark In to mark the beginning point of your Replay Shot capture.
Create All Replay Shots
Select Create to create additional Replay shots.
Update All Replay Shots
If no replay shot exists, selecting Update creates a new Replay shot. There after, selecting Update updates the first Replay shot created.
Configure
Displays the Replay Shot settings window.
For more information about Replay Shots see Replay + ISO Menu.
ISO enables you can set up ISO recording and do Replays from the same menu. To use Replay and ISO functionality, select the Replay + ISO menu.
Start All
Activates all configured ISO shots and/or the Program Replay. When activated, the menu item becomes Stop All. Click Stop All to deactivate the Create Replay Shot system.
Program Replay
Allows you to Stop, Mark In, Create, or Update a relay shot.
Replay Mark All
Allows you to tighten up your Replay Shot capture. Select Replay Mark In to mark the beginning point of your Replay Shot capture.
Create All Replay Shots
Select Create to create additional Replay shots.
Update All Replay Shots
If no replay shot exists, selecting Update creates a new Replay shot. There after, selecting Update updates the first Replay shot created.
Configure
Displays the Replay Shot settings window.
Once ISO outputs are created, all ISO outputs are listed in this menu. To configure an ISO output, click Configure, then click the Add ISO button.
Social Menu
Note: To view a complete list of the default application keyboard shortcuts, see Finding an Application Shortcut.
The Social Media menu presents options for Facebook, Comments, and Zoom.
The Facebook sub-menu includes the Create New Poll item, and a list of any previously-created polls.
Create New Poll
When clicked, Wirecast opens the Create_New_Poll dialog.
See Creating a Facebook Poll in Wirecast and Selecting a Facebook Poll.
Comments
When clicked, Wirecast opens the Comment Moderation dialog, listing comments about the broadcast that are posted to Facebook or YouTube.
Zoom
When clicked, Wirecast opens the Join Zoom Meeting dialog.
Window Menu
Note: To view a complete list of the default application keyboard shortcuts, see Finding an Application Shortcut.
Welcome to Wirecast
Displays the Welcome screen.
Opens the Encoder Presets window.
See Encoder Presets and The Encoder Presets Window.
Audio Mixer
Opens the Audio Mixer window.
Audio Plugin Explorer
Opens the Audio Plugin Explorer dialog box.
PTZ Controller
Opens the PTZ Controller Panel.
Wirecast Pro allows you to remotely control cameras with built-in pan, tilt and zoom (PTZ) features using the built-in PTZ Controller window. This feature currently works with PTZOptics and Lumens cameras that support VISCA over IP control, as well as NDI PTZ protocol controls.
USB Devices
Opens a list of all USB devices.
Rendezvous Dashboard
Opens the Rendezvous Dashboard. Click Start Session to use.
See Rendezvous.
Displays the Advanced Rendezvous Audio Mixer window, which includes the following controls:
–Output from [document] Select document source from the pull-down menu.
–Channel Output level indicators for each channel.
–Include In Mix When checked, this audio source is included in your Rendezvous session.
–Audio Level (Sliders) Move the sliders to adjust the audio level.
See Opening the Advanced Rendezvous Audio Mixer.
Download Manager
Opens the Stock Media download monitor window. Whenever you add a Stock Media Library file, the downloading progress is displayed. You can cancel a download by clicking on the X icon. To navigate to the location of a downloaded file, click the spyglass icon.
Notifications
Opens the notifications window. This window displays last “important” log messages and other application health messages.
New Layer Window
Opens a new Main Layer window for the layer selected.
Document Windows
All open document windows are listed at the bottom of this menu.
Descriptions of the controls in the Rendezvous Dashboard follow.
See Starting a Rendezvous Session.
Control | Description |
|---|---|
Displays available audio sources. The Advanced menu item opens the Advanced Rendezvous Audio Mixer. See Rendezvous Audio Mixer. | |
Start Session button | When clicked, Wirecast starts a Rendezvous session. |
When clicked, Wirecast disconnects or re-opens the previous Rendezvous session. | |
Displays bitrate, audio, and video data for the guest stream | |
•“P” icon | When clicked, Wirecast adds the guest to the Rendezvous session, and to the Rendezvous Dashboard. |
When clicked, Wirecast opens a menu from which you can select: •Assign Placeholder •Toggle Network Statistics •Disconnect (guest) from Rendezvous session |
Descriptions of the controls in the Rendezvous guest window follow.
See Joining a Rendezvous Session as a Guest.
Control | Description |
|---|---|
Help Menu
Note: To view a complete list of the default application keyboard shortcuts, see Finding an Application Shortcut.
Opens the Wirecast Virtual Assistant dialog.
See Wirecast Virtual Assistant Help.
Open Wirecast User Guide on website
Opens the online version of the User Guide.
Open Wirecast PDF User Guide
Opens the PDF version of the User Guide.
Open Tutorial HTML
Opens the Wirecast Tutorial in your browser. To follow the tutorial, you'll need to Create a Document for the Tutorial as well.
Create Document for Tutorial
Creates a new Wirecast Document which contains the media necessary for following the Tutorial.
Buy/Upgrade
Opens Licenses in the Preferences dialog. This window allows you to purchase licenses and to activate or deactivate them.
Provide Feedback
Opens the Telestream Website feedback page where you can enter any feedback you may have about our product or company.
Opens a Support Assistant dialog window. To create a new support ticket, select Create a support ticket. The information is sent to the Telestream support team for evaluation. If you have been previously issued a case number, select Link with existing support case # and enter your case number. You can also select Do not receive follow-up from Telestream. This enables you to send support information to Telestream without receiving a response. Click Save Report to save the information to a file on your computer. Click Send Report to send the information to Telestream.
For troubleshooting purposes, you can reset your preferences to the defaults by clicking the Reset Preferences button. This will reset your preferences and create a backup of your current preferences, in case TS Support needs it.
For troubleshooting without resetting preferences, you can also open Wirecast in “Safe” mode using Shift + Control + Open.
Note: You must click Send Report to create a ticket. If you click Save Report, a ticket will not be created.
Open Scripting Documentation Opens the Wirecast Scripting Help document.
Show Scripting Examples Opens the directory where the Wirecast Scripting examples are located.
Visit Telestream LLC Website
Opens the Telestream Website home page.
Visit Wirecast / Desktop Presenter download page
Opens the Telestream Website download page for Desktop Presenter.
Acknowledgments
Opens an on-line help to Acknowledgments.
About Wirecast
Opens a dialog box that displays the Wirecast version number and copyright information.